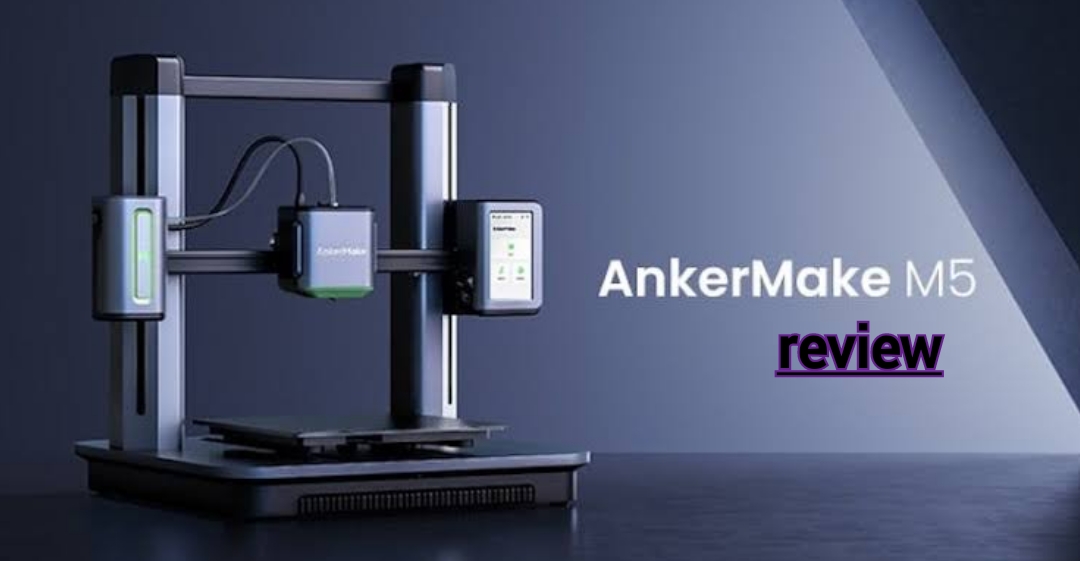
Ankermake M5 Review: May we introduce This is Anker’s first 3D printer called Ankermake M5 . Anker, especially known for its power banks, is launching a 3D printer in i3 format that prints at a very fast 250mm/s by default and comes with an AI-supported integrated camera . You can now find out in the test whether “M5” in the model name could stand for “Mega to the power of 5”.
Ankermake M5 Review
- AnkerMake M5 3D printer
- at Geekbuying for €594 – Coupon NNNDEM5ANK | Amazon for €599.99 | Ankermake.com for €599 – Coupon: WS24HAPPYPD1
- Specifications: sounds great
| Manufacturer | Model | AnchorMake (Anchor)| AnkerMake M5 |
| printing technology | FDM (Direct Drive) |
| print speed | max. 500mm/s (originally 250mm/s) |
| installation space | 235x235x250mm |
| print bed | heatable (up to 100 degrees), PEI spring steel plate (magnetic) |
| max. nozzle temperature | 260 degrees |
| nozzle diameter | 0.4mm |
| Motherboard | CPU | AnkeMake M5 Board V8111 (STM32F4) with TMC2209| Dual XBurst(1.2GHz) + XBurst 0(240MHz) |
| connectivity | USB-C, Wifi (accessible via app or slicer), voice control via Alexa/ Google Assistant |
| features | Auto leveling (fully automatic)250mm/s (default), 300mm/s (maximum)AnkerMake Slicer (Cura-Fork) with direct printer connection (Windows/macOS)App AnkerMake including real-time videointegrated AI-supported 1080p camera (day and night vision, timelapse possible)Belt tensioner (x and y)filament sensorPowerloss recovery |
| overall dimension | Weight | 50.2 × 43.8 × 47 cm (without filament holder) | 12.4kg |
To get started: AnkerMake – what is that?
If you have stocks or want to have stocks, you will eventually hear the word “diversification” – i.e. the widest possible spread across different stock products so that you don’t put everything on one card, but have a broad base. You could also see it that way at Anker. Because in addition to the “master brand” Anker, there are now Soundcore (audio) , Eufy (smart household and security technology) and Nebula (beamer) . The newest member in the Anker universe is AnkerMake . Products related to 3D printing will be sold under this brand in the future .
AnkerMake (“Maker” in the 3D printing scene is the name given to creative 3D printing users who produce models themselves using CAD software) launched a Kickstarter campaign for the AnkerMake M5 in early 2022 . With 11,313 backers and over $8.8 million in funds raised, it’s the most successful Kickstarter campaign to date.
Not least because of the current world situation, the originally announced price could not be met. Instead of around €700 to €750, it now costs €849 . If that’s too much for you, just take a look at our 3D printer theme world, where you can find many other interesting 3D printers. A well-equipped entry-level printer is, for example, the Sidewinder X2 or the Ender-3 S1 (Pro) .

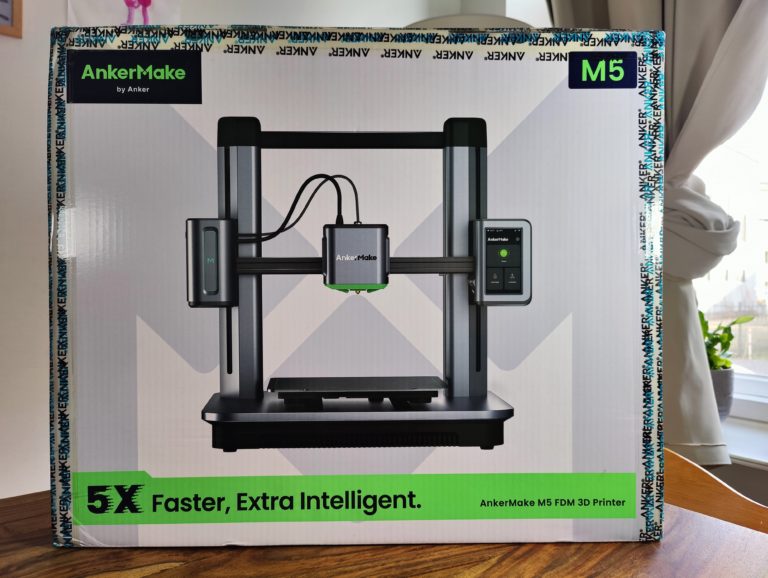
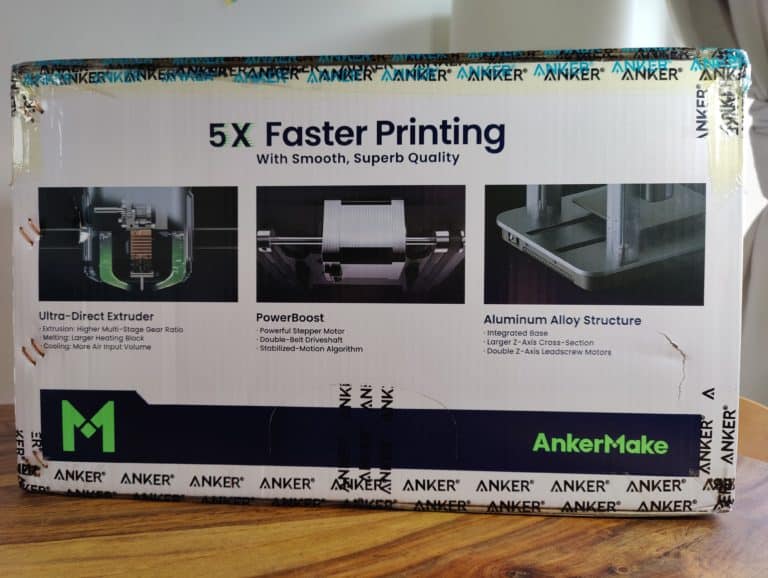
The box alone is already noticeable. Why? He makes something. It is not the usual brown box with a picture of the printer, but a box in the AnkerMake design, mainly in white and green, with a picture of the printer (in color), detailed photos of the highlights and all sorts of listings of specifications.
It’s already clear here: AnkerMake not only has its sights set on the 3D printing purist who doesn’t care about design, but who is armed with a rotary knob display and micro SD card and heads into the 3D printing jungle. Here, an additional group of buyers with less 3D printing knowledge who value design and usability is specifically addressed. In short: Anker wants to bring 3D printers to the masses.
One cannot speak of a standard scope of delivery with the AnkerMake M5. Well packaged in three layers of foam , the printer base, Z-axis assembly, high-quality filament holder, a few screws, power cable and 250g white PLA+ from Anker are delivered. Praiseworthy: A second PEI spring steel plate is included.
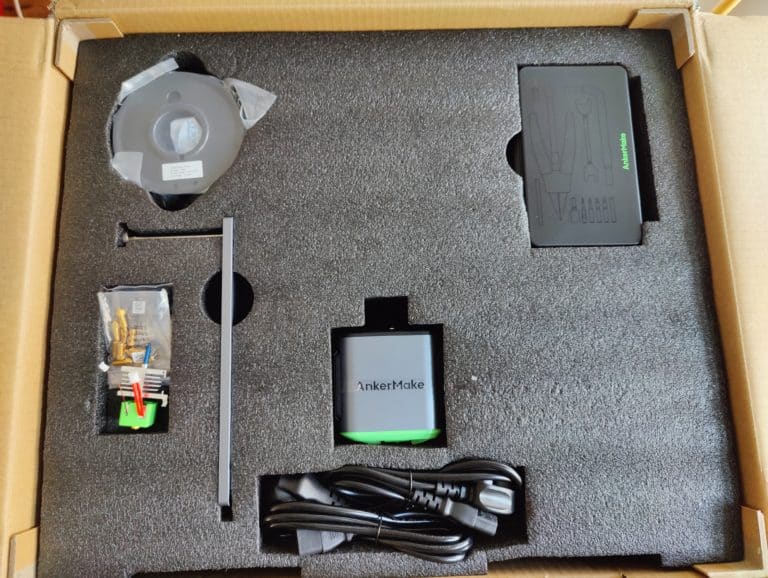
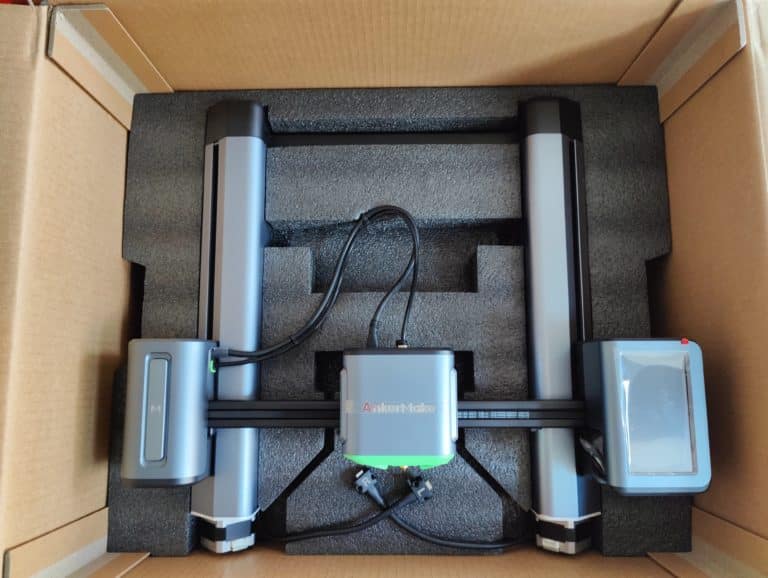
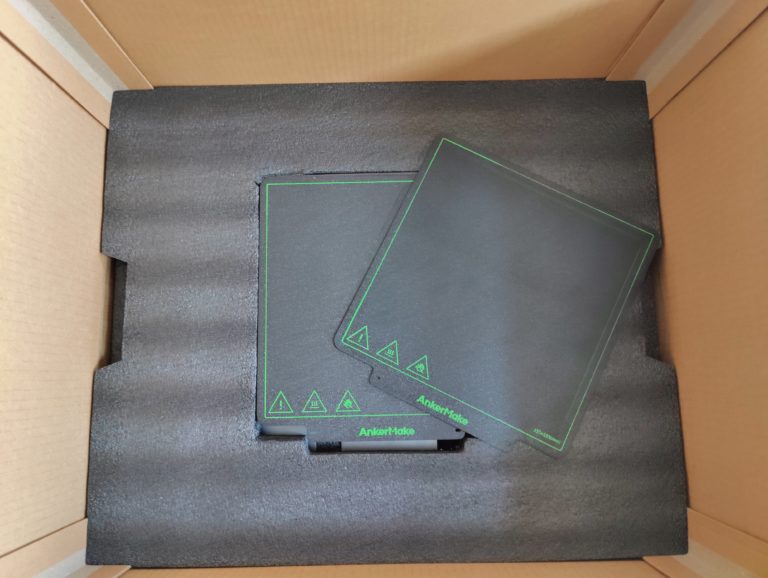
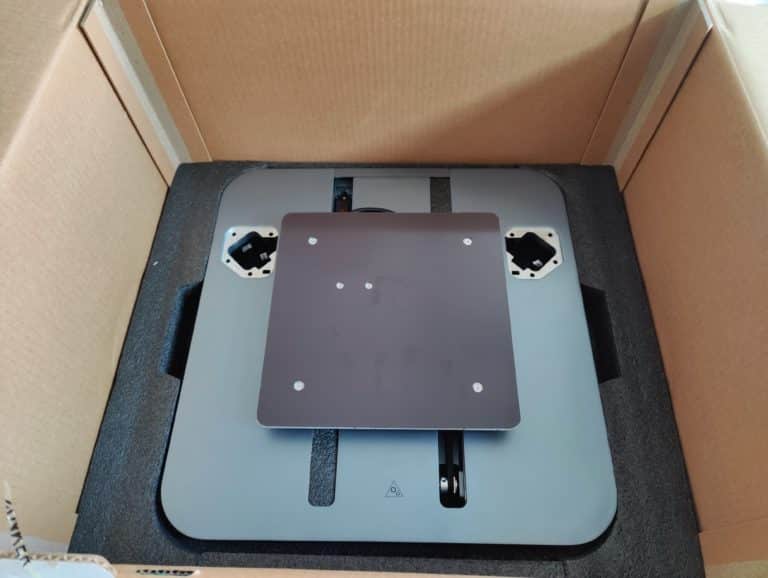
Two things strike me as particularly positive: firstly, the tool and the replacement nozzle. Personally, I’m missing really practical tweezers, but because the whole thing comes in an extra storage box , it makes up for it completely. Second: In addition to a proprietary replacement hotend, Anker supplies 10 replacement nozzles (1x 0.2mm, 7x 0.4mm, 1x 0.6mm, 1x 0.8mm). Together with the nozzles on the tool and the two hotends, that makes a total of 13 nozzles – nice!

Design: style & usability?
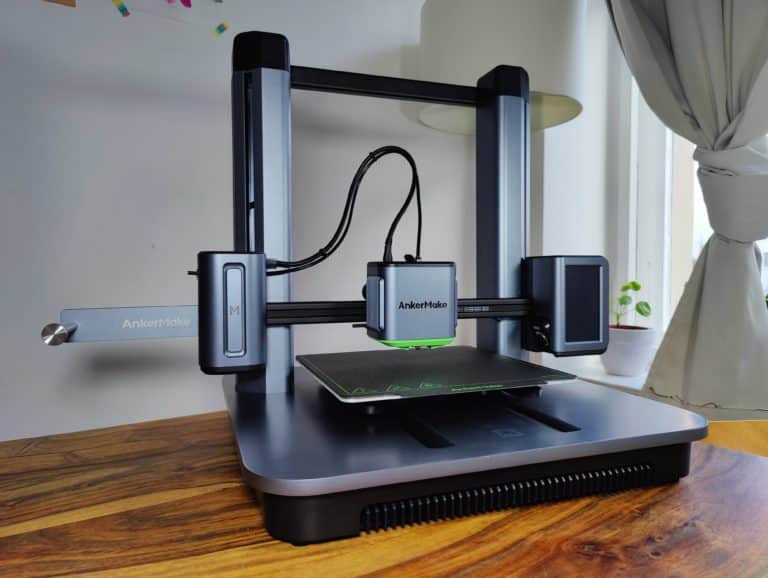
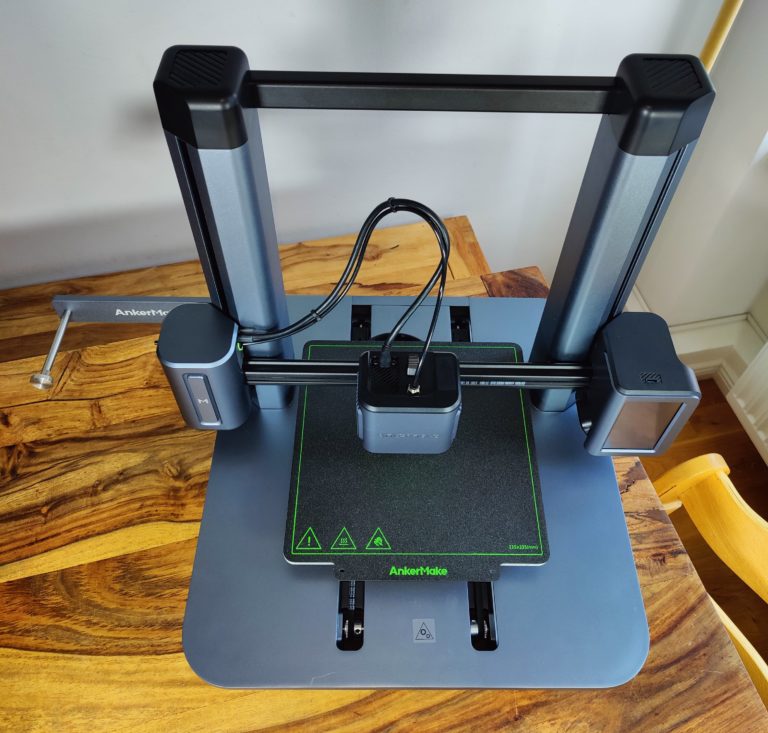
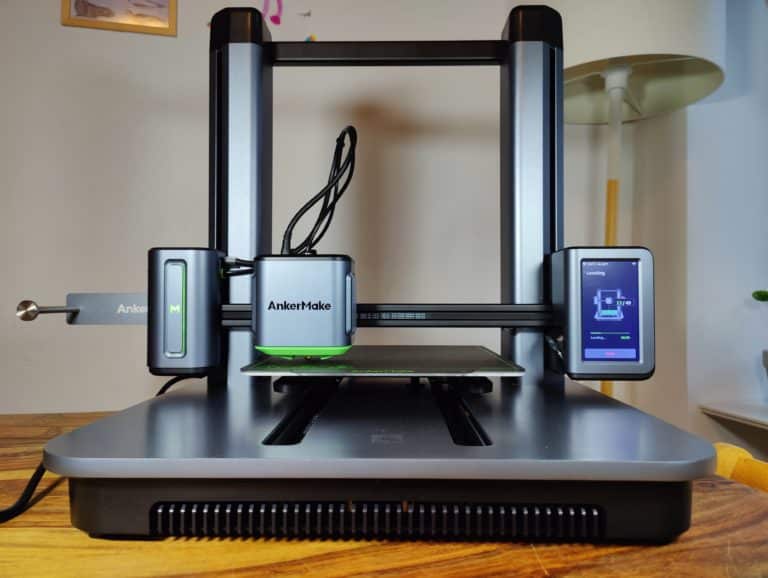
First of all, the AnkerMake M5, which is gray with black plastic elements, is similar in principle to many other Cartesian i3 printers such as the Ender-3 S1 . That means: movable print bed in Y-direction (here: double belt); two Z-axis spindles, on which the X-axis including the print head can move up and down.
LED filament feeder on the left
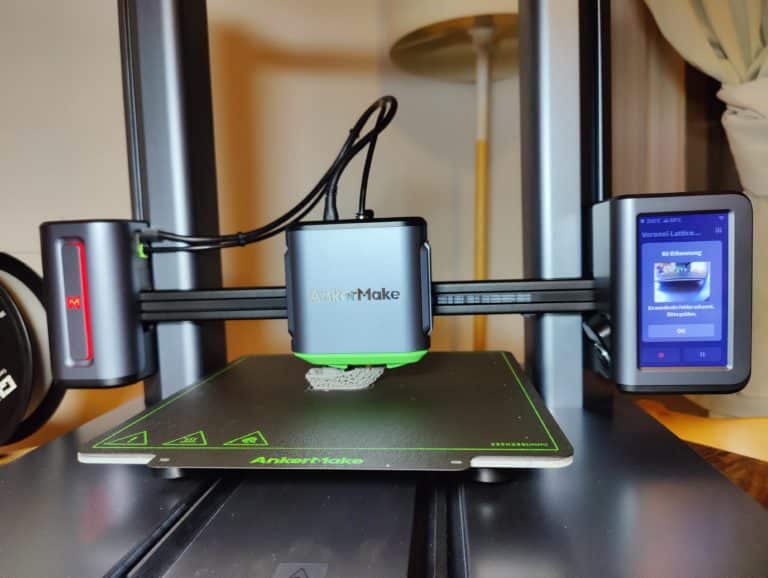
Speaking of the X-axis: the two main design elements are located at both ends . Let’s first come to the box on the left , which is approx. 7.5 x 13 x 7.5 cm . It has two functions: firstly, the filament inlet is on its left side , secondly, it shouldn’t do anything else, but look good.
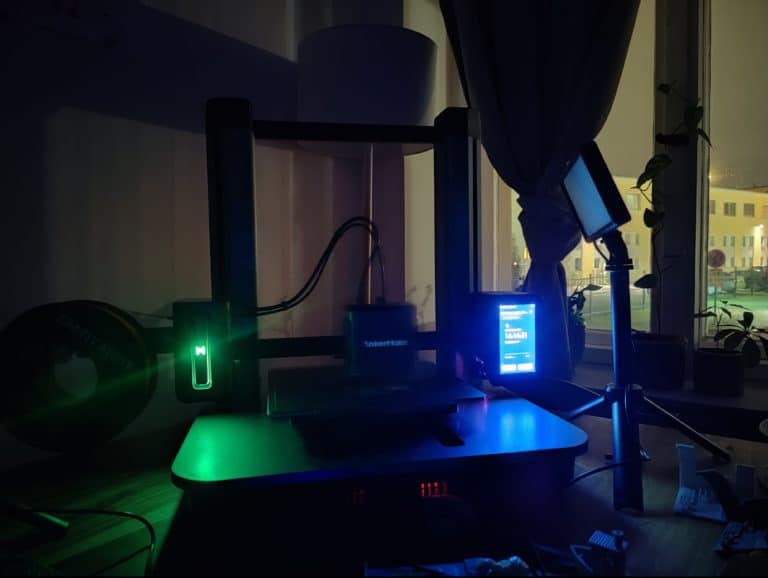
A square LED bar with a running light effect is installed on its front , which includes a silver, also illuminated M (AnkerMake logo). These LEDs are eye-catchers. They light up green in standby and when printing, yellow when heating up and red in the event of an error message initiated by the AI. Also remind me either of the good old Snake on old Nokia cell phones or KITT’s sensor light in Knight-Rider – has something!
Display, camera & USB-C on the right
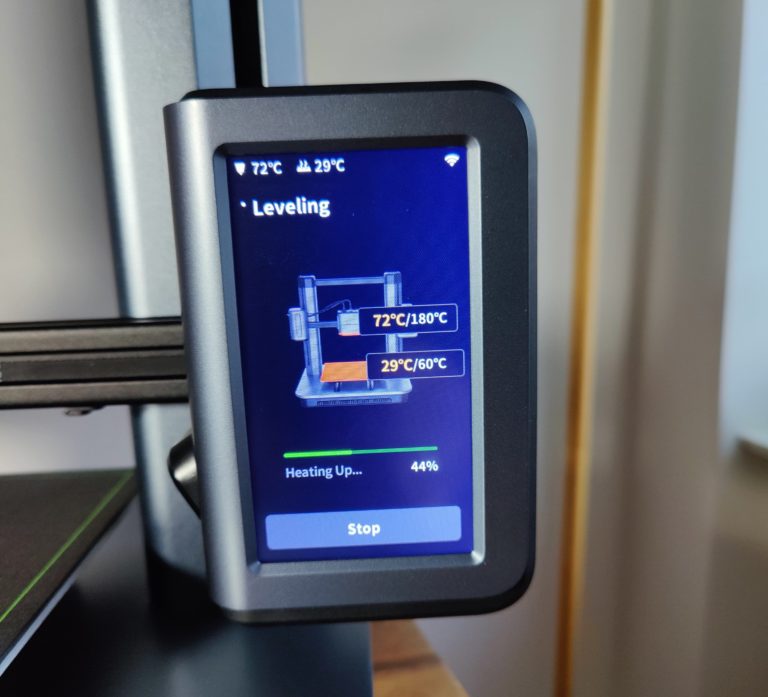
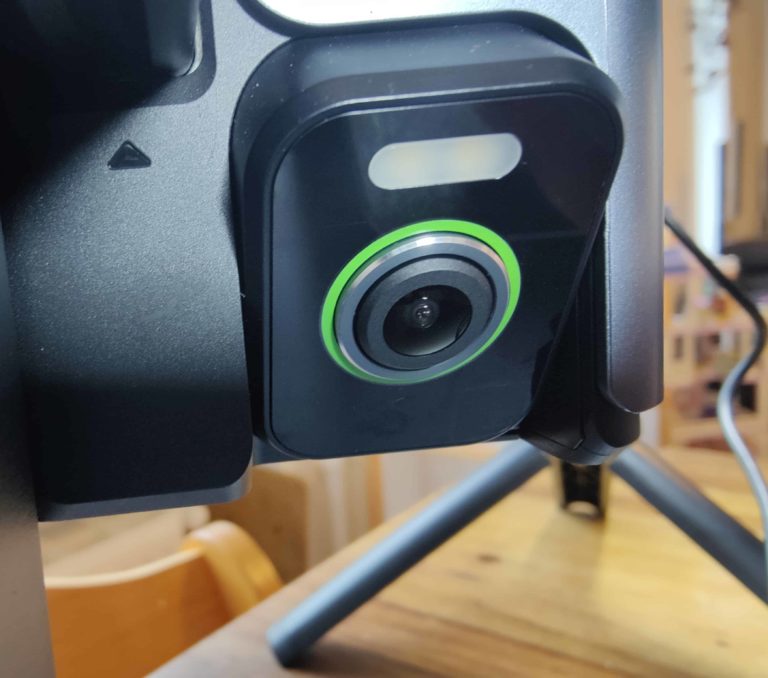
The slightly thicker twin brother of the left box is located on the right at the end of the X-axis. This box on the right is larger, at least in terms of width and depth, measuring approx. 9 x 12.5 x 9.5 cm. He has to, so that the 4.3-inch touch display has enough space on the front. There is also a USB-C port on top of it and the AI-supported 1080p cam on the left side , which is aimed directly at the print bed.
More connections?
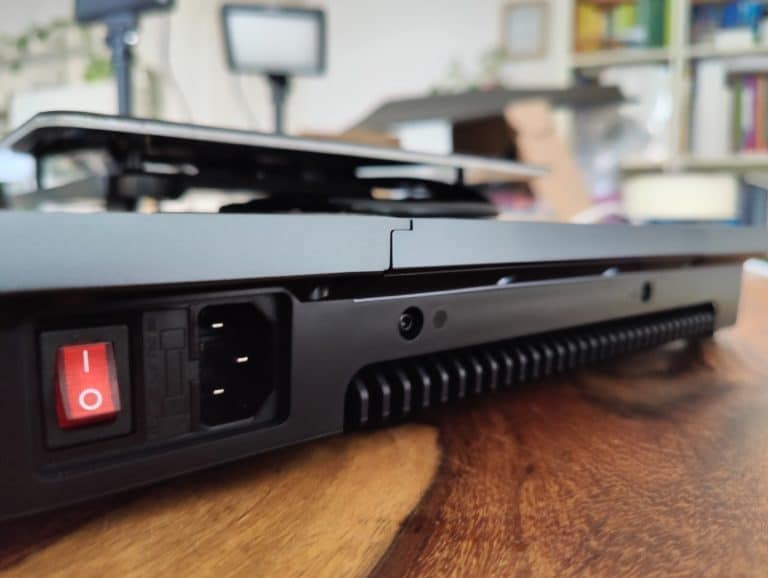
At the back of the printer base there is only an indicator for the set voltage, the cold device cable connection and a power toggle switch. You will look in vain for other control buttons or connection options. Minimalist design = plus point for usability or minus point for versatility? We’ll see.
Disguised & massive
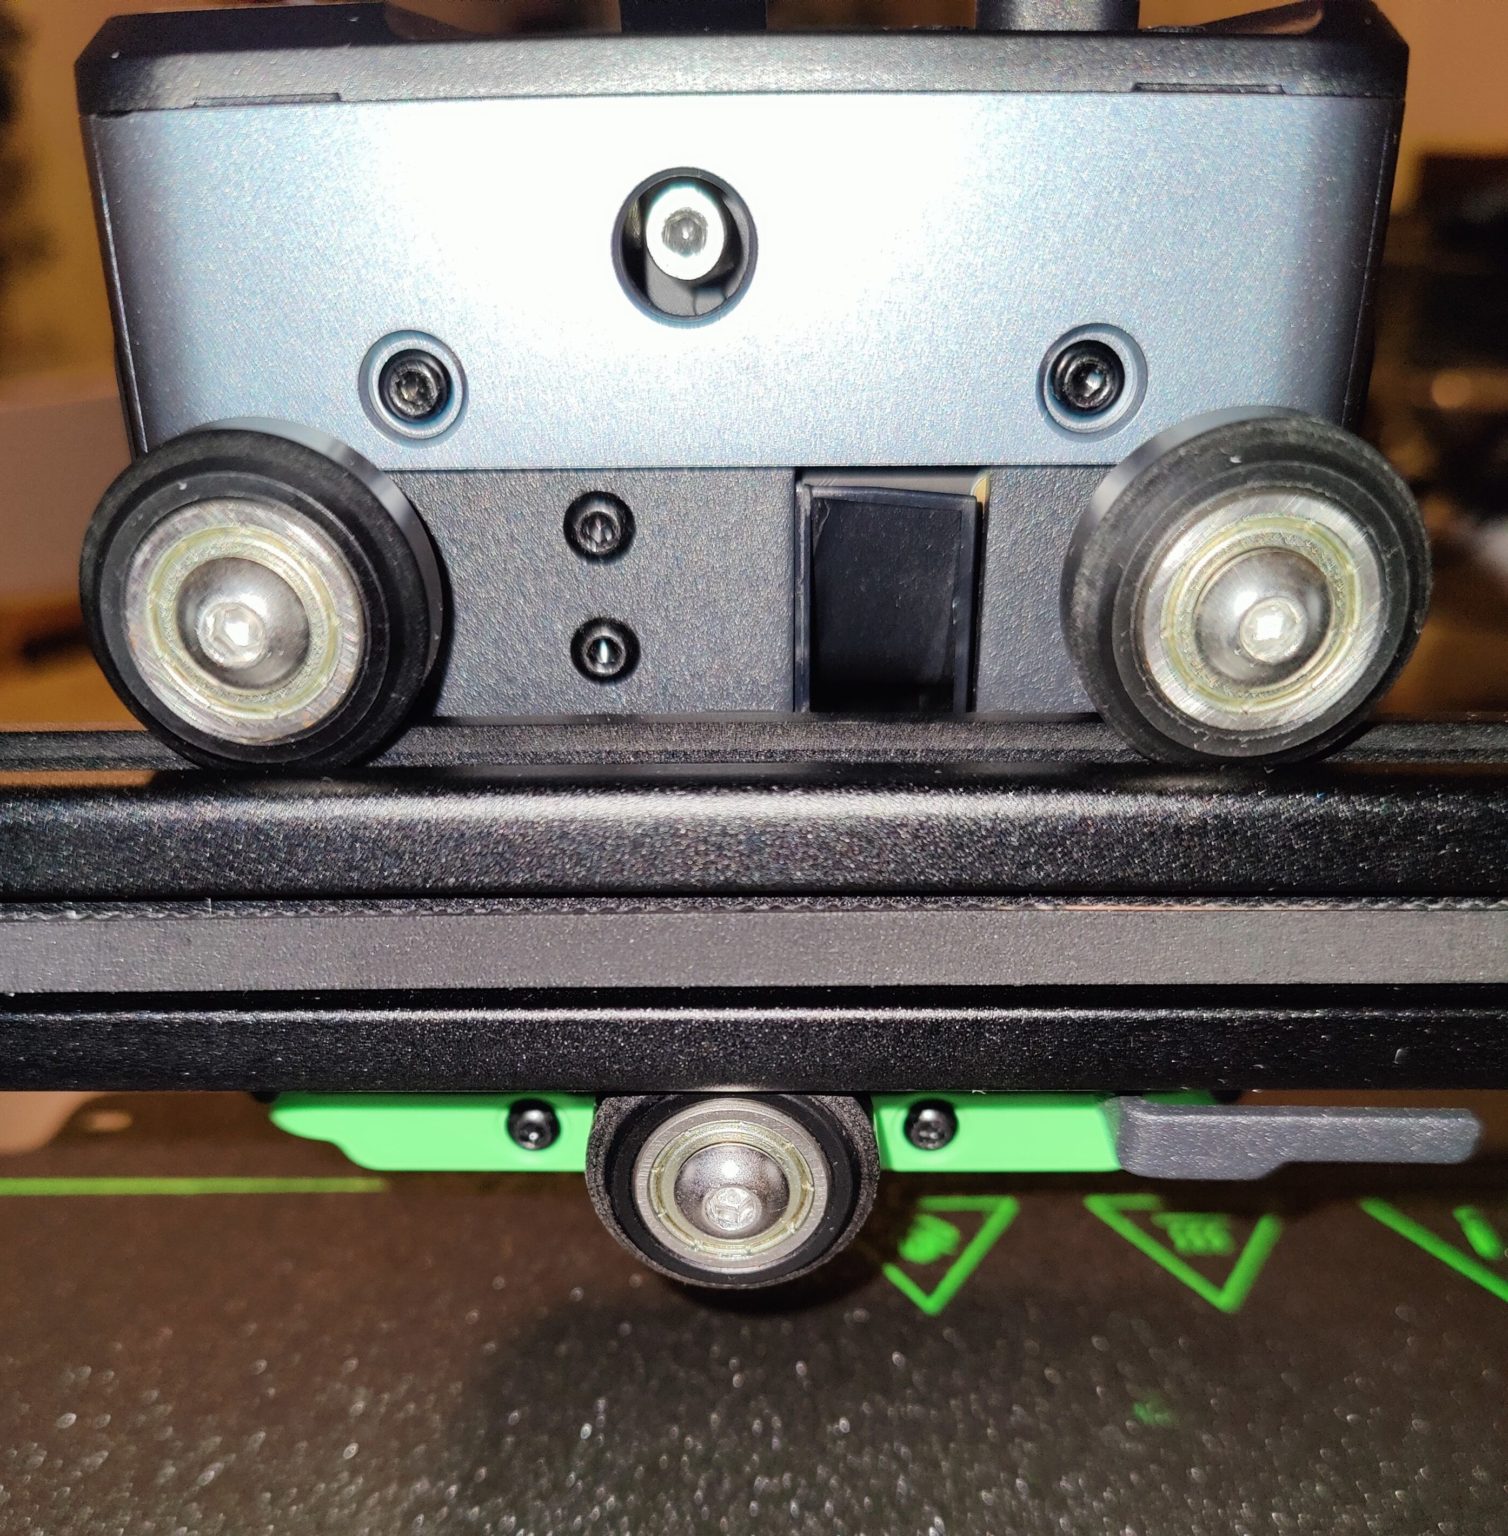
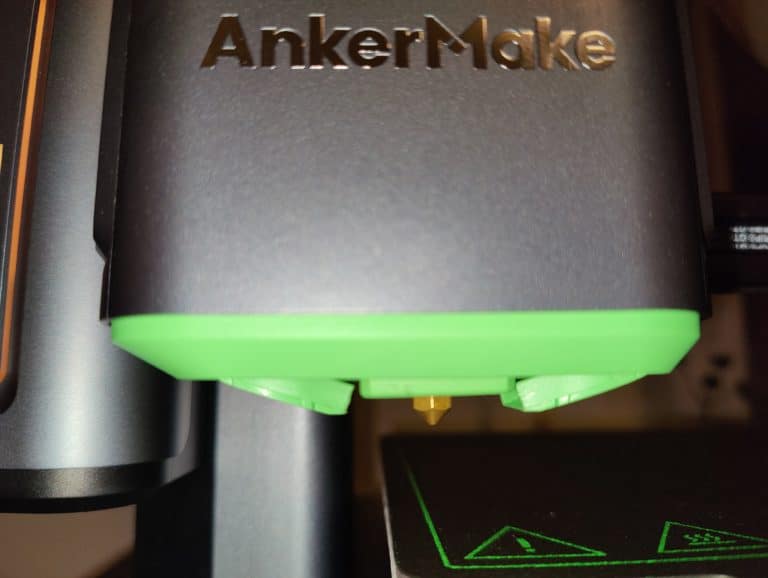
What else clearly distinguishes the AnkerMake M5 from other printers: Everything is disguised or completely hidden. This applies to the print head as well as to the barely visible, separately driven Z spindles. In addition, there is also a largely hidden, tidy cable management and such a massive construction that I have rarely seen with 3D printers.
The entire floor inside the printer base (which of course I opened up, more on that later) is lined with cast iron . Also the Z-axis construction with its heavy metal columns due to the stability and minimization of vibrationsliterally matters here. The large ventilation grilles on the right and left of the print head, but especially on the front of the printer base, round off the modern, beefy impression. In my opinion, the AnkerMake M5 is the SUV among the i3 printers.
Build Quality & Construction: Immaculate but heavy
- Thought Through
The design team at Anker and AnkerMake did a great job. You can see that even in the manual, which explains the structure in a few very simple steps and reveals that a lot of thought has obviously been given to intelligent cable management . I can’t put it any other way: The workmanship is impeccable, well made, AnkerMake!
Interesting innards
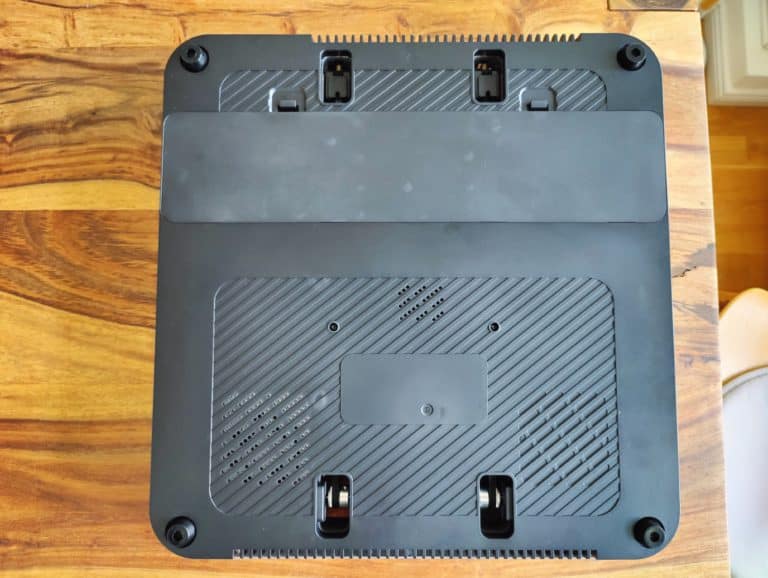
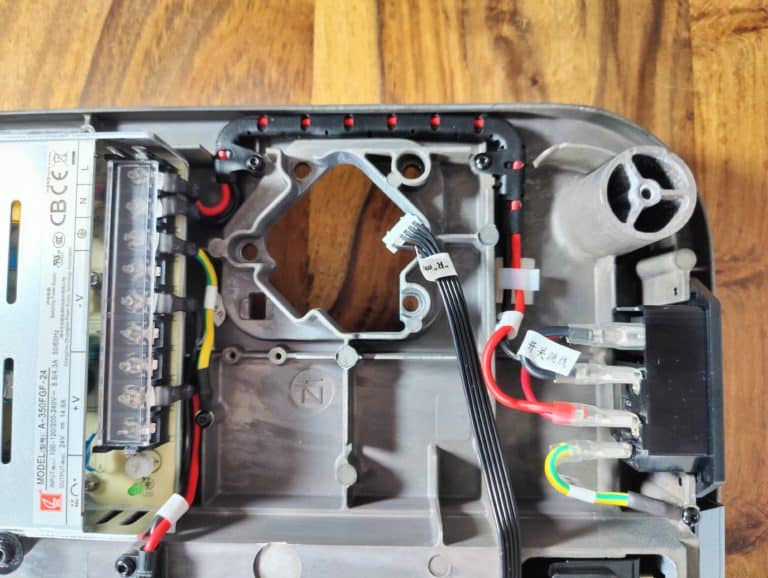
Before assembling the printer, I take a look at the inner workings of the printer base . 4 rubber feet and 9 hexagonal screws later reveal a huge cast iron plate under the cover or in other words: Lots of iron – little technology: That’s why the stepper motor that drives the double Y-belt seems downright small. The 24V power supply (A-350FGF-24) does not come from a brand manufacturer.
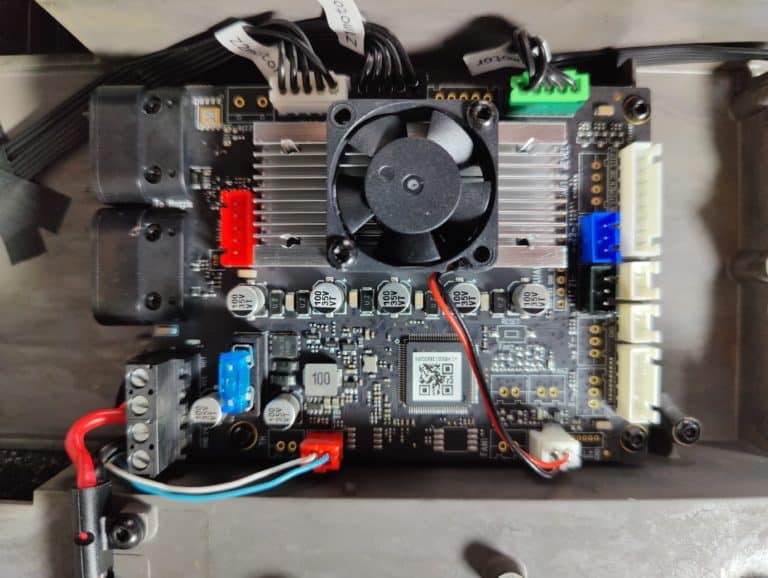
The AnkeMake M5 Board V8111 with STM32F4 microcontroller and TMC2209 drivers stands out because of its connections: Because Anker uses USB-C interfaces here, the plugs of which are screwed on for a secure hold, similar to VGA connectionscan be – something different! All cables are otherwise equipped with cable lugs and are additionally insulated – 1+ with an asterisk.

Easy assembly – with four hands
Now I’m building the printer and despite using the method suggested by Anker of using the packaging (foam) to help build the Z-axis frame I realize : I’d like to have four arms spontaneously (temporarily) because the thing is heavy. I managed it myself, but to my shame I have to admit I made a scratch on the top front of the printer base.
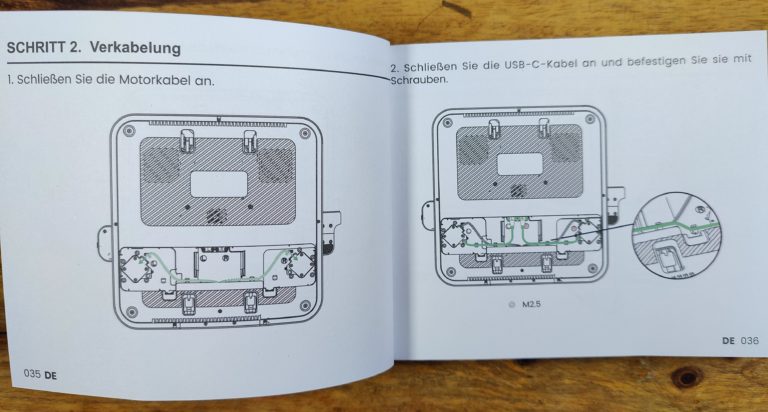
However, the assembly itself is very easy. Open a maintenance hatch underneath the printer base , Put the Z-axis assembly on top and fix it with screws, connect the motor cables of the two stepper motors, plug 2x USB-C cables (idiot-proof labeled R and L) into the printer base for connection to the mainboard – done.
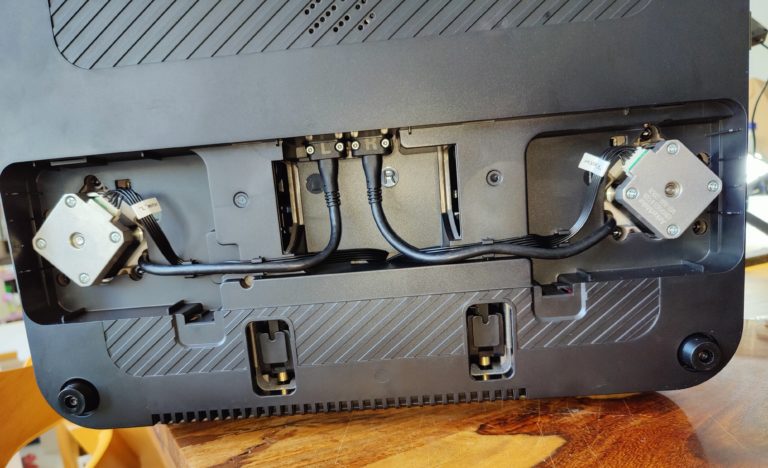
Well, almost: The filament holder still has to be installed. You have the choice between placing it on the top left of the cross brace of the Z-axis assembly or on the left at the back in a horizontal orientation . I choose the latter – while I know that the printer is very massive, I want to avoid any additional vibrations caused by the spool of filament ON the printer. Now connect the cold device plug and turn on the toggle switch next to it. Tadaaa, the AnkerMake M5 reports to the print service.
Commissioning & features: off to the test rabbit hole
- Fan running & app forced
What first strikes you next to the fancy LED with running light effect and the switched-on display: the fans of the AnkerMake start up directly – and they do so permanently – regardless of whether the printer is in standby or not. For further setup, registration with AnkerMake and the use of the corresponding app is mandatory – a pity. But this is the only way to integrate the printer into the home WLAN . He doesn’t like the direct connection to the PC because he doesn’t react to it.
Perfect Auto Leveling?
If the AnkerMake M5 is then connected to the Internet, it also pulls the first update directly – wonderful. Even better: Before I can play around too much on the touchscreen, I’m prompted for auto-leveling, which takes 10 minutes but scores 49 points. The whole thing happens fully automatically and thought has been given here as well: the heating bed and nozzle first heat up to 60 or 180 degrees before the auto-leveling takes place using the load cell (distance between nozzle and pressure bed).
I think that’s great, especially since the setting wheels underneath the bed, which I hate, aren’t even there (a little tip here: It’s best to always do the auto-leveling without inserted filament. Because there’s always a minimal blob of the filament despite running Purge Line stays on the nozzle, otherwise you will have a 49-point pattern on your print bed).
Fast touch display
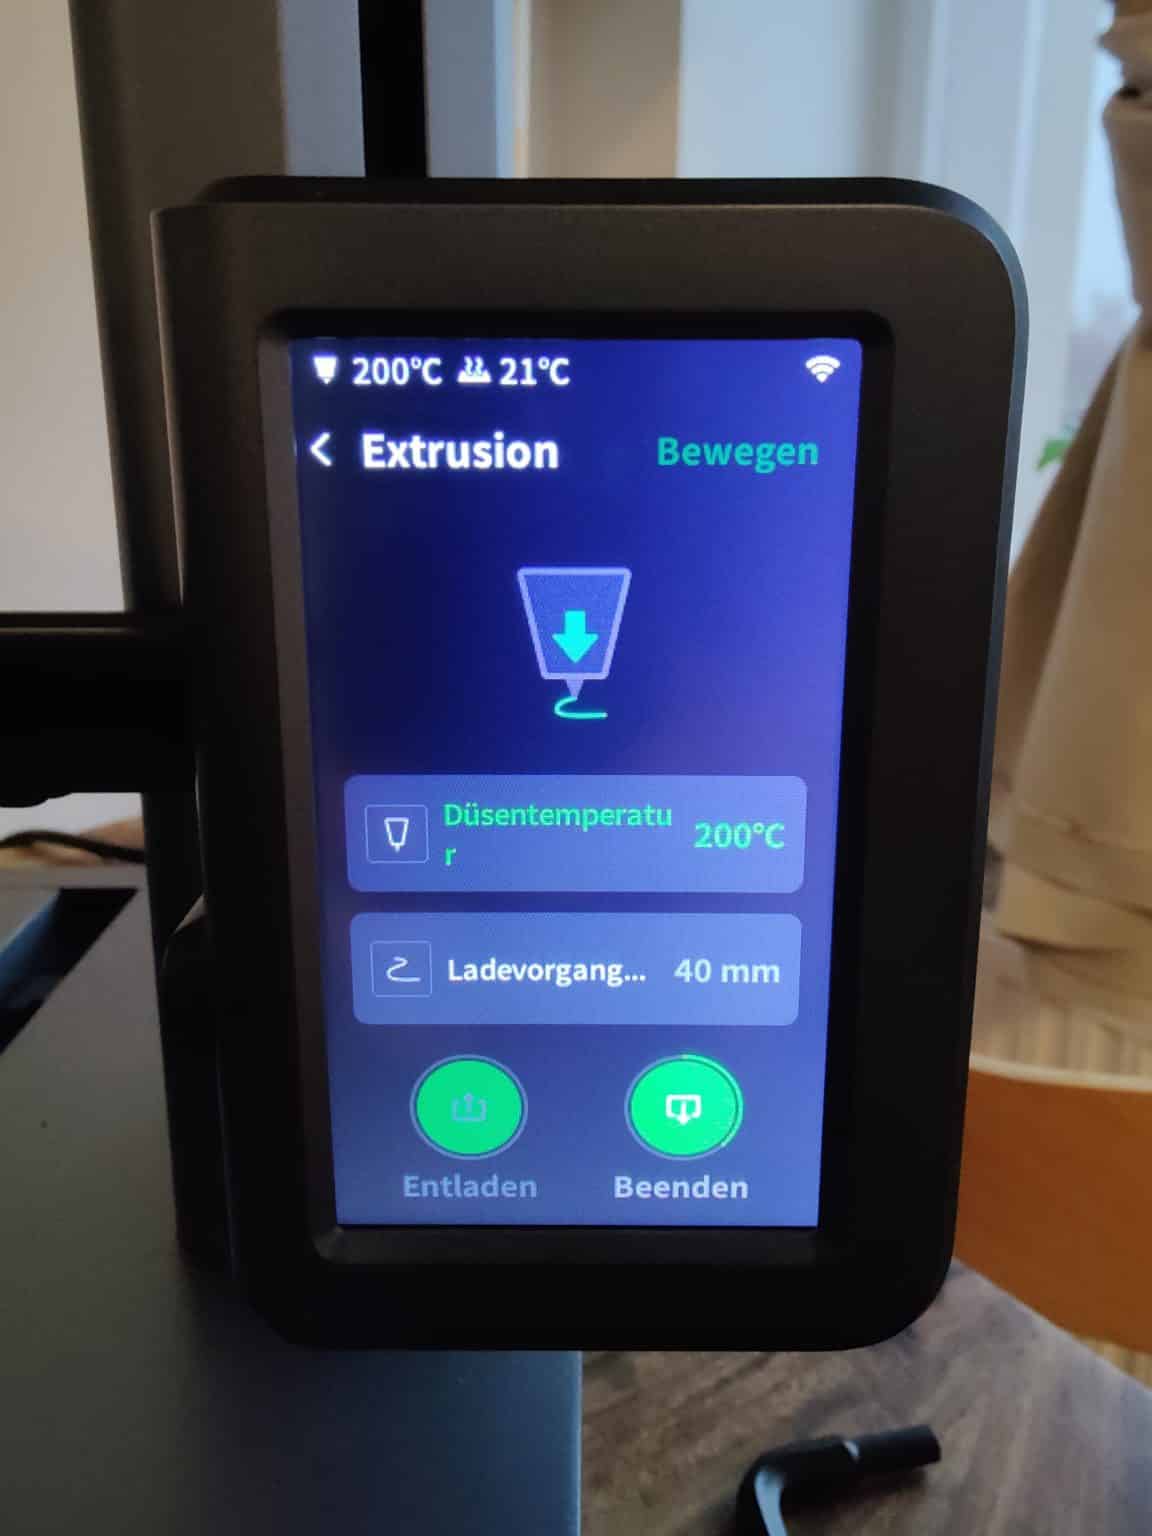
The touch display mounted on the X-axis is a passenger on the Z-way up. So it moves minimally when typing. In the test I got used to it very quickly. Touch inputs were fast and fluid. The menu navigation is nicely clear and intuitive. Nice: When filament is fed in or ejected, I can decide on the speed as well as the length of the extruded material.
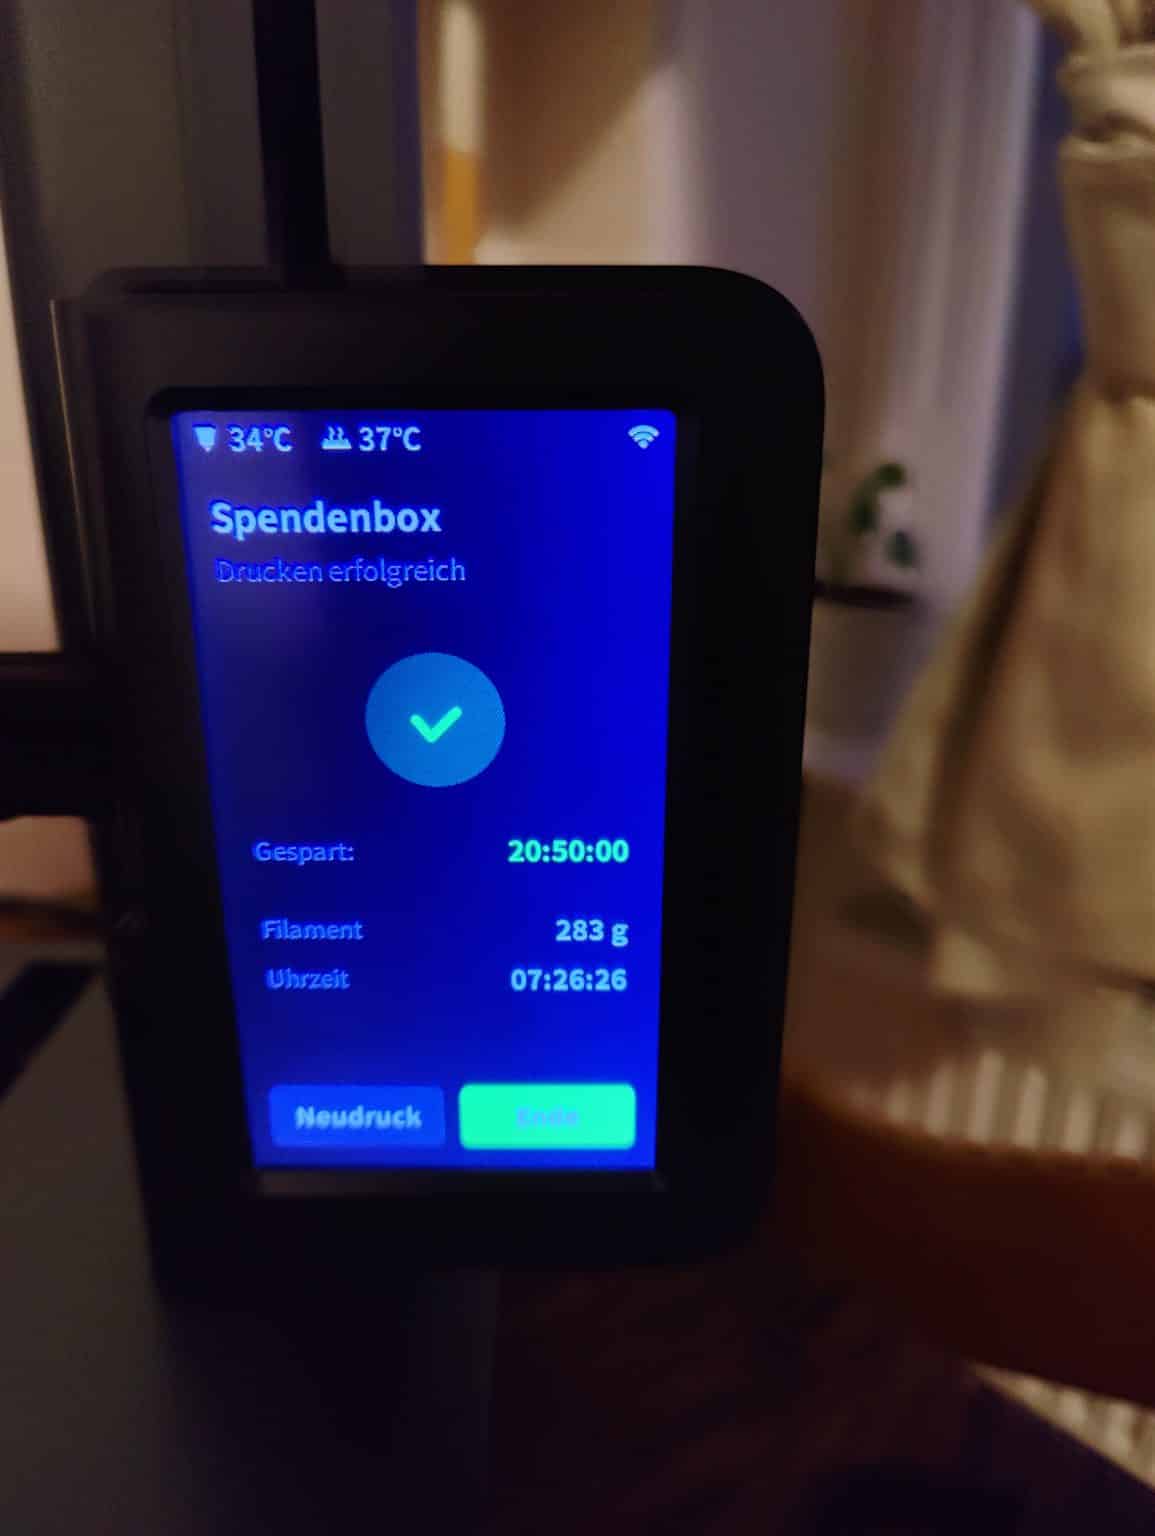
During the print the remaining time is displayed, I can change the Z offset ,Adjust pressure and bed temperature as well as pause or stop printing . At the end of a print , the print time , the filament used and the (supposed) time saved thanks to the fast print speed are displayed. However, you cannot adjust much more on the display. This may be helpful for inexperienced users, but it protects against tinkering. More experienced users will miss one or the other setting option (example: extrusion multiplier).
Volume, power consumption & temperatures
The AnkerMake M5 is not a quiet treadmill – but given its speed, it cannot be either. As mentioned before, the fans run as soon as you switch it on. I measure an average of 62dB from a distance of 50cm to the print head (filament inlet). This is unnecessary , as nothing should have to be cooled at least in standby. Here, Anker can add a software update (firmware status at the time of testing: V2.0.46_2.0.40).
When idling , the AnkerMake M5 treats itself to an average of 9.5W . With autoleveling it is then 94.2W. The heating up from bed and nozzle (about 2.5 minutes) requires 274.8W on average. When printing, the component cooling is activated after a short time. Then the AnkerMake M5 draws an average of 147.3W (220 degrees hotend, 60 degrees nozzle).
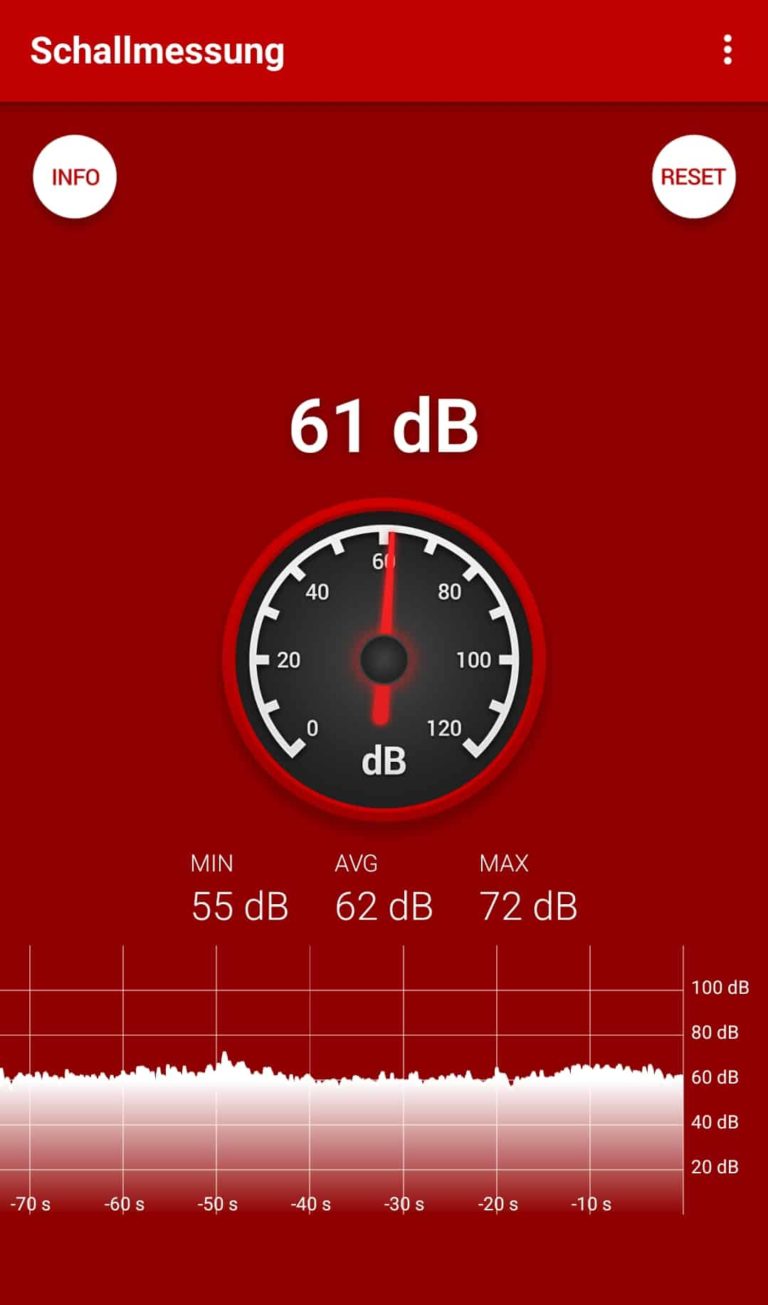
But: With said component cooling we are now at a whopping 70dB on average. Yes, I measure from a distance of 50cm. Nevertheless: That is simply 20 dB above the specified 50 dB by AnkerMake. The whole thing appears high frequency not only because of the high fan speed, but probably also because the air is pressed out through a small outlet on the back of the print head . For printing with ABS/ASA (which is a mood killer without a pressure housing anyway) the rearward directed airflow is helpful – but it reminds me of jet planes from the last TopGun film. So: Close the door when printing!

The heat distribution on the heating bed, which is not insulated from below, is okay, but not homogeneous . After 20 minutes at a set 60 degrees , I measure in the corners where the adjustment screws are usually: front left 56.2 degrees, front right 58.8 degrees, rear right 58.1 degrees and rear left 56.5 degrees. In the middle it is 57.8 degrees. However, it should be said that this has no influence whatsoever on the adhesion of later prints.
Starting difficulties: Extruder vs. Thommy
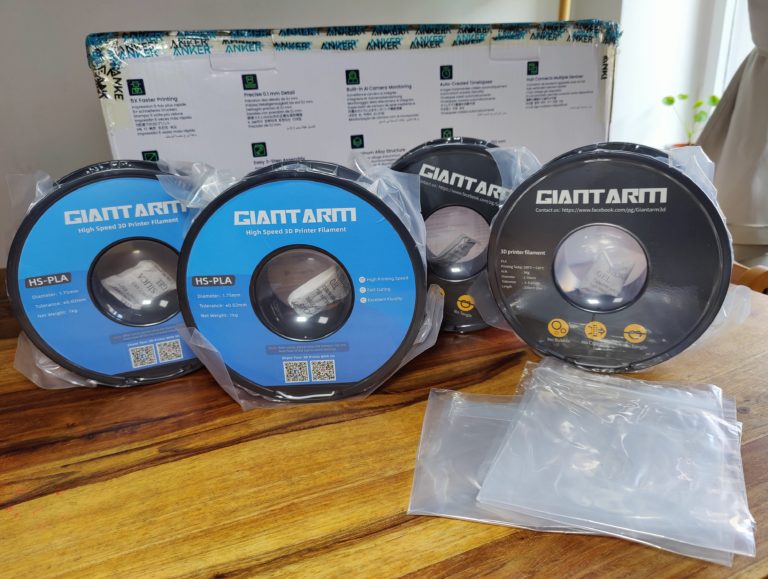
So far everything has gone well and I want to start printing now. Just quickly introduce the brand new GIANTARM filament : It is fed through the box with LED lighting on the left through a hose (reverse Bowden setup = very good!) to the direct drive extruder integrated in the print head.
As with other 3D printers, you briefly pull the lever down and you notice: It has grabbed the filament. Problem: The extruder doesn’t pull the filament in any further – as if it hadn’t really grabbed it. I’ll try again with a different PLA filament. It doesn’t work – not even with force. I get my wife, who is gifted in craftsmanship, and she also confirms: It’s not possible.
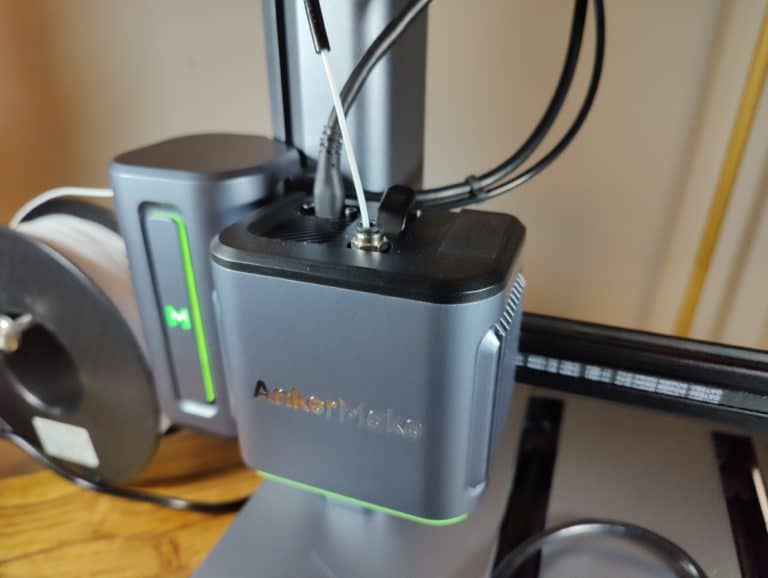
Can’t do it – doesn’t exist, I think. At some point it works after a long fiddling, and I’m about to disassemble the print head. Obviously the filament doesn’t seem to find its way into the extruder with 100% accuracy . The contact pressure does not matter : the extruder clicks at regular intervals, but does not feed any filament. Since then, the workaround has worked for me: pull out the PTFE tube by pressing the pushfit so that only the filament is visible. Then click “Load” on the touch display and manually help above the print head until the extruder really grabs and feeds the filament. That’s how it’s done. That isprobably an isolated case for me, but for more than 800€ let’s hope that it will remain an exception after the market launch . Otherwise, inexperienced users in particular could quickly become frustrated.
Software & AI: promising but buggy
- App: good & expandable
The app already makes a good tidy impression , but is still a bit sparse in terms of functionality. There are three main tabs at the bottom: Discover on the left, Devices in the middle, and Me on the right. Under “Discover” there is still a blank with the reference that the function is still in development. Under “I” on the far right I see my e-mail account, the location where the automatically taken time-lapse recordings of my prints are stored and, in addition to “Info” and “Help”, the settings.
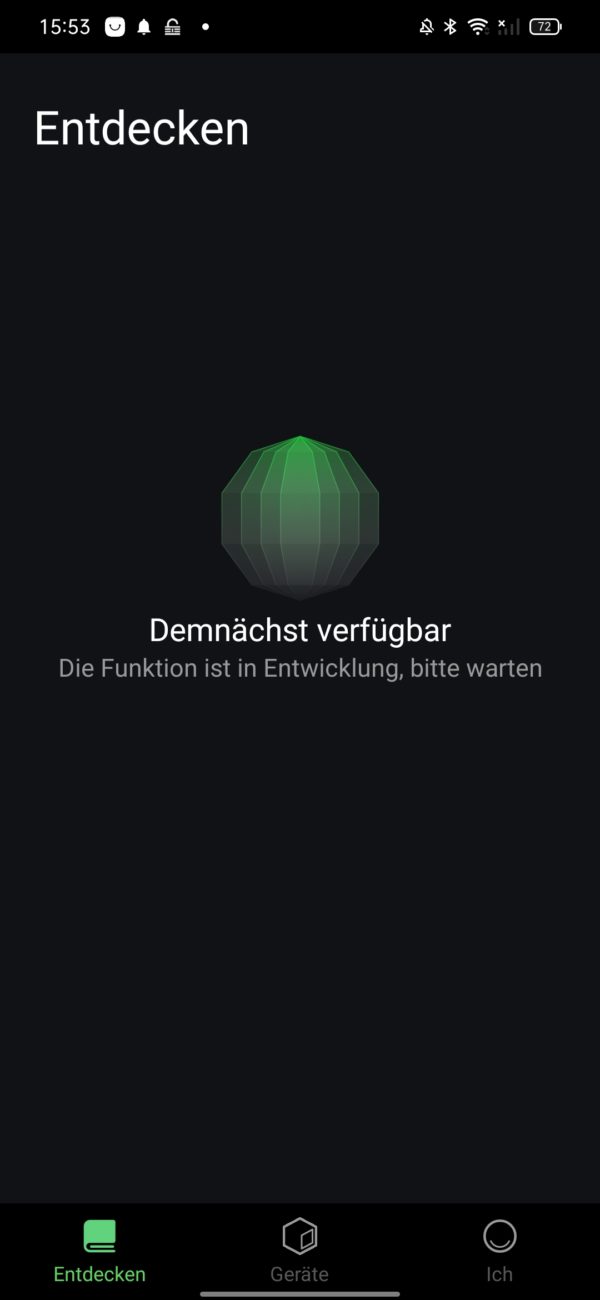
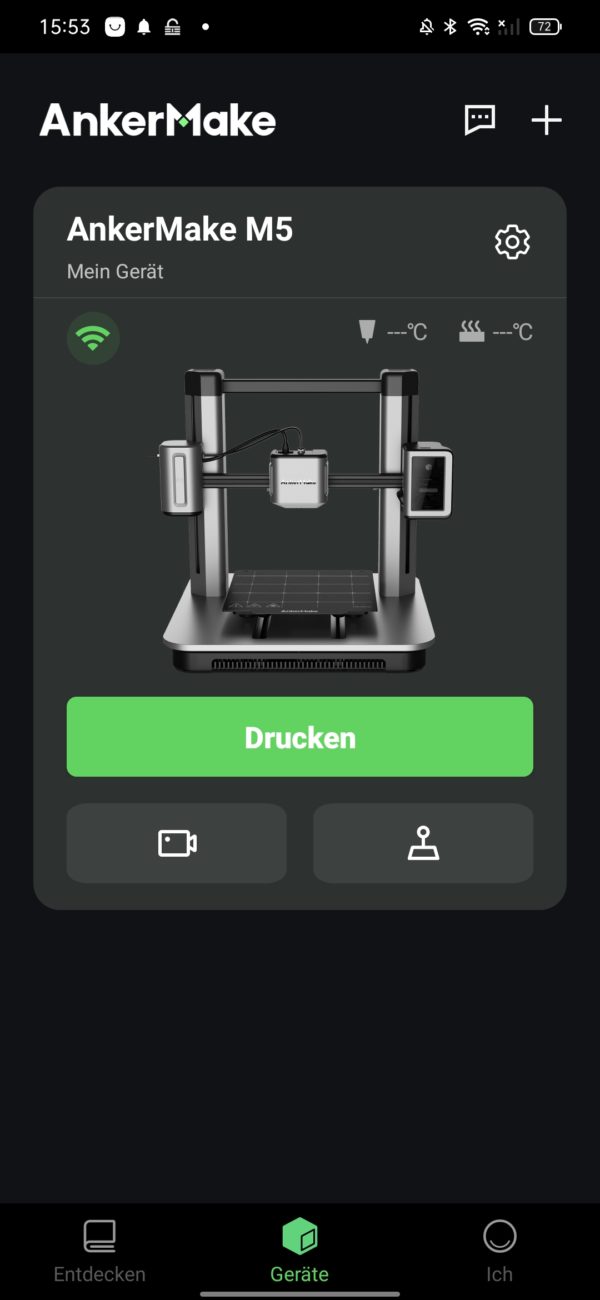
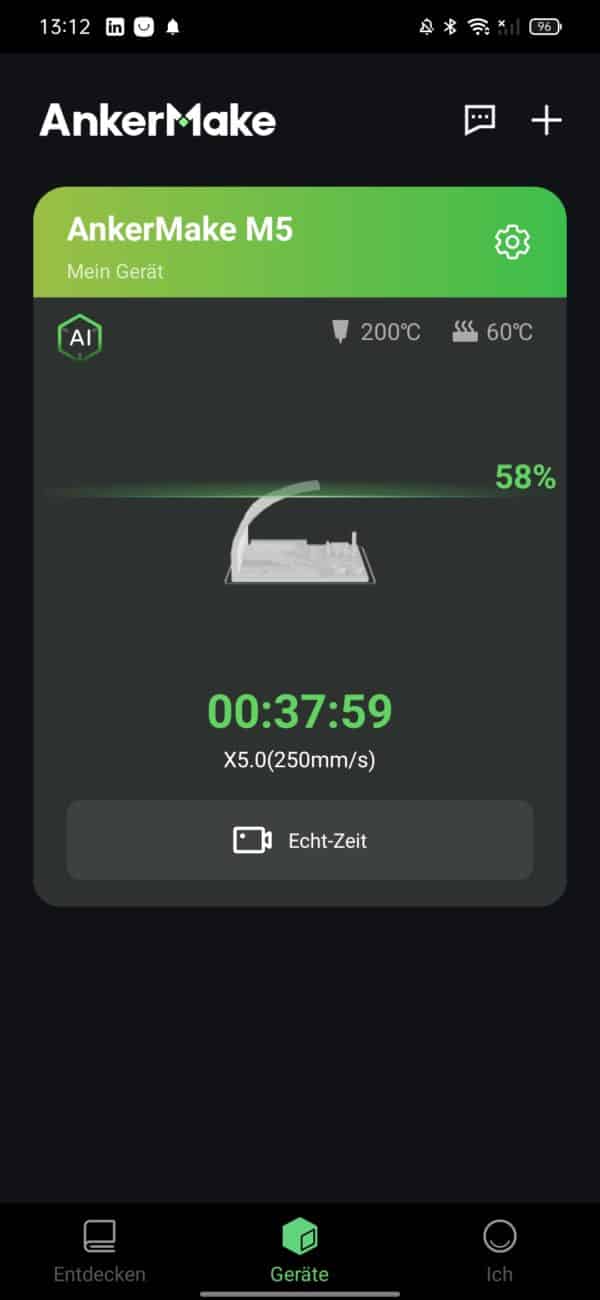
The most relevant, however, is clearly the “Devices” tab, which is the app’s home screen for a reason. The message center can be seen at the top right, and finally the app notifies you via push message when a print is completed or error messages appear. Additional printers can be added right next to it. Below is a large schematic image of the connected AnkerMake M5. Some settings (printer name WLAN connection) can be called up using the “gear” icon. The log function is certainly the most useful here.
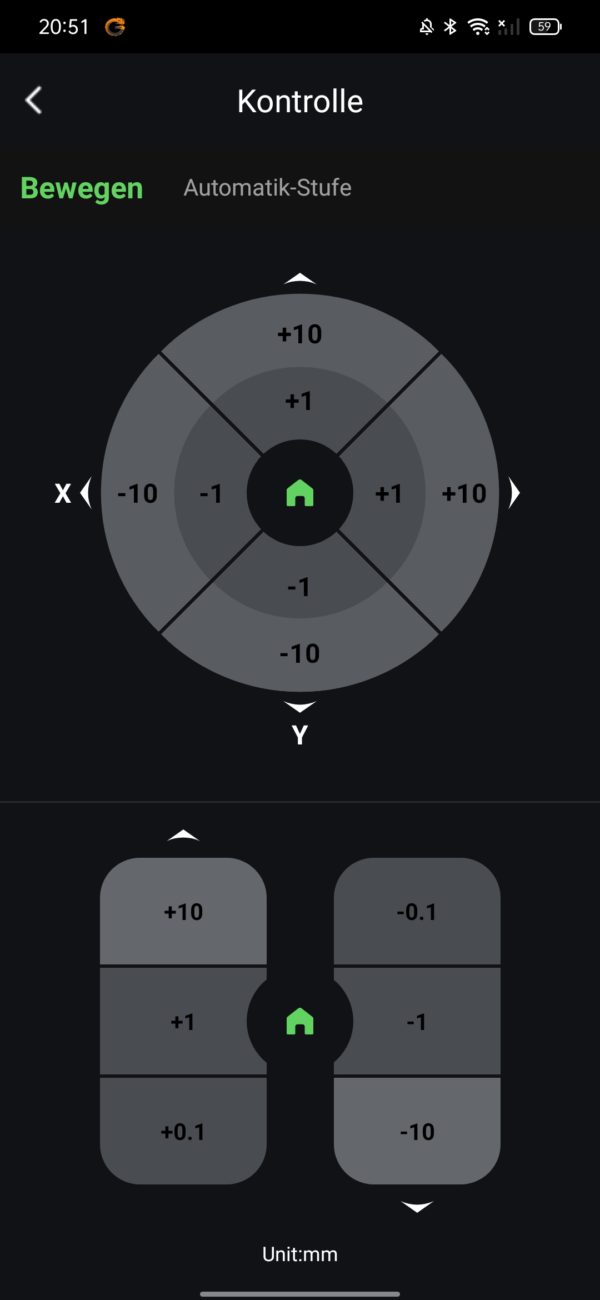
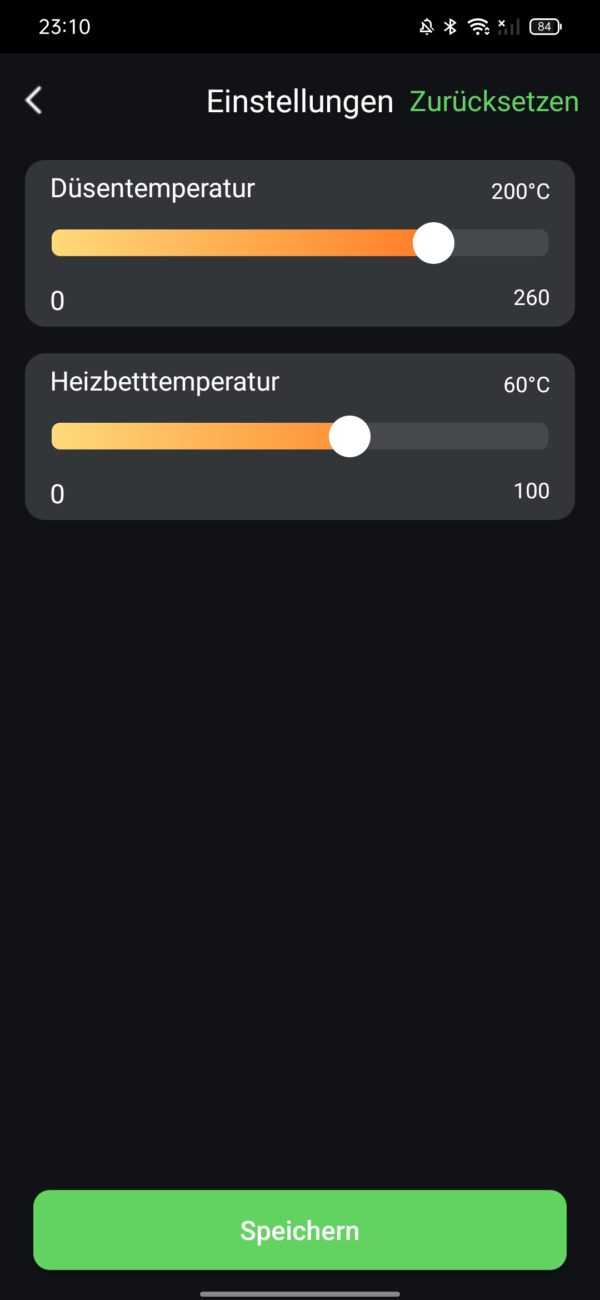
Clicking on the printer’s image shows its internal memory, which has a benchy and a torture/calibration test on it . If I had connected a USB stick , I would also be able to see the print files available there in the USB tab next to it. All axes can be moved and autoleveling can be carried out via a “control” icon . But I used another icon the most – the camera, which I will talk about later.
Slicer: unfinished
The AnkerMake Slicer (Version 0.7.4) is a fork of the well-known Ultimaker Cura slicer – but (still) without the Arachne Engine, which ensures better print quality. So if you know Cura, you will quickly find your way around. Because A like Anker should look good like AnkerMake, there are now acode instead of gcode files here.
The latter are also compatible, but then have to do without the AI function . Because these are only integrated into the respective acode file. This is model information for the AI, which is then compared with the actual print. Unlike the gcode, however, this information is not legible for us – after all, you can enjoy the cryptic symbols.
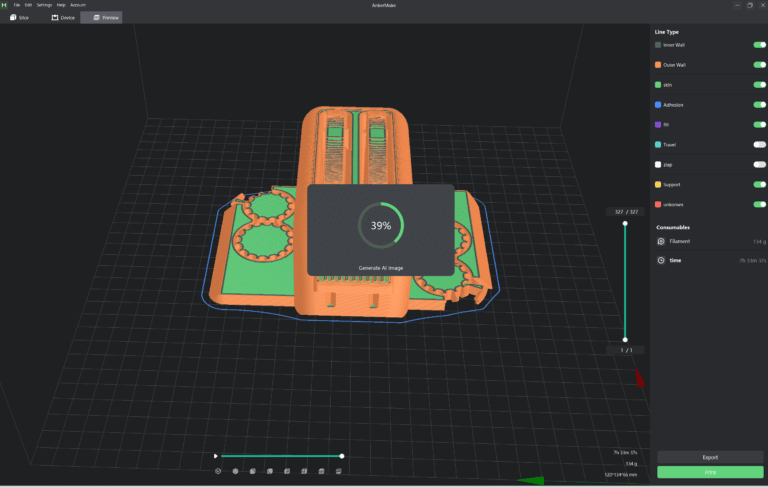
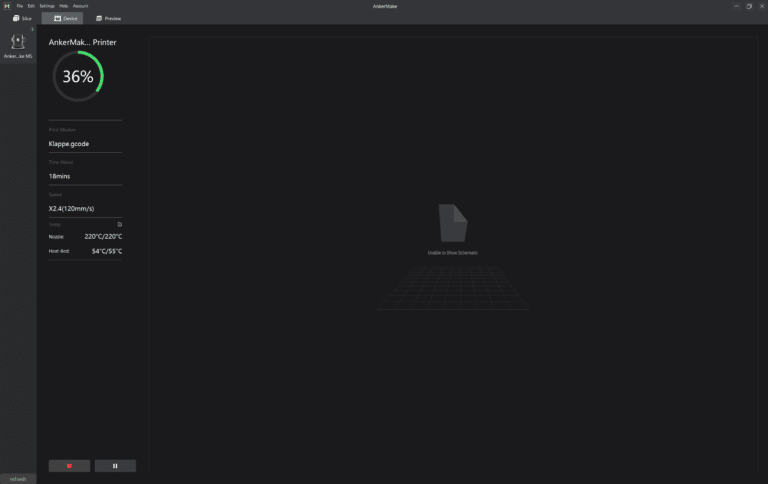
The slicer ‘s front end reacts quite sluggishly. I am used to the auto-align function of Cura , i.e. the automatic alignment of the largest lower model surface on the print bed. It doesn’t exist here yet. So if a print model is not automatically placed correctly on the print bed, you have to move it manually millimeter by millimeter – that’s annoying. Also interesting: I ca n’t access the “Edit” and “Settings” tabs in the top left when I have selected “Device” or “Preview” from the tabs below. In addition, only the 0.4 nozzle in the slicer can be selected.
This cannot be changed in the device settings for Cura, äääh, for the AnkerMake Slicer. But what else is good: I can send a print job to the AnkerMake M5 directly in the slicer. What is less good: If I close the slicer, I have to log in to AnkerMake in the slicer with my account every time in order to be able to use this function.
AI camera: unfinished part 2
The 1080p camera offers a good picture of what’s happening on the print bed – even if its shooting angle sometimes doesn’t produce ideal streams. It can be activated via the camera icon in the app just below the schematic image of the AnkerMake M5. Screenshots and recordings can be made.
In addition, the resolution of the stream can be reduced or the entire image, in which the date and time stamp are integrated, can be converted to landscape format. Day vision and night vision via infrared functionare on board. If it is too dark, a light can be switched on – very cool. But I think it’s a pity that the camera only works via the app and not yet via the slicer.
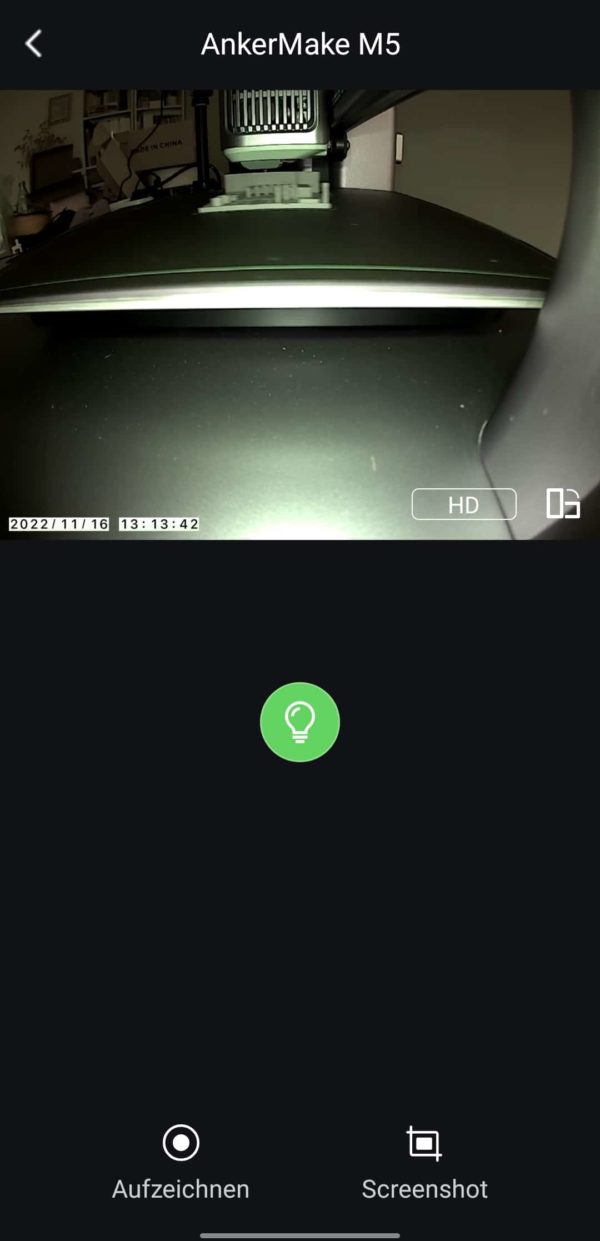
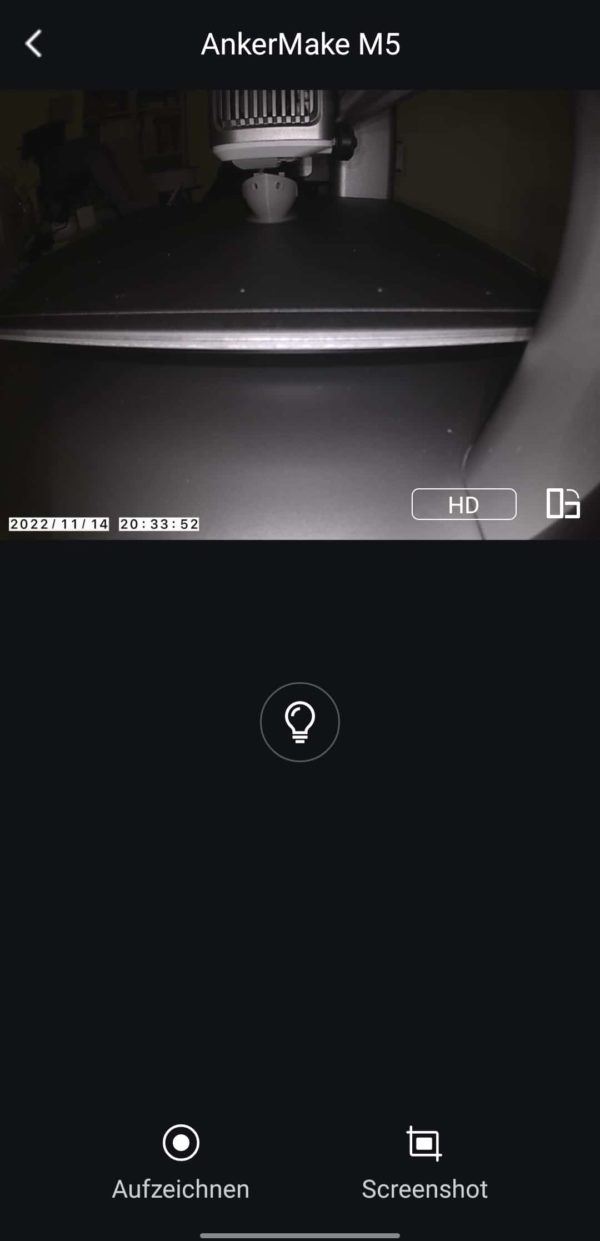
The AI function is still very expandable and tends to a lot of false alarms . Would you like an example? In a Voronoi bench (printing time: 01:22 hours), the AI responded with a total of 23 incorrect error messages. In the Torture Toaster test it was “only” 9 times . First guess: Is it because of the lighting in our living room? In other tests, however, it is speculated whether a non-homogeneous background could be a cause.
So that means: Maybe you can reduce the false positive rate if you tidy up your booth during printing or if you have a homogeneous, single-color background right away. The AnkerMake M5gives an error message – also via push to the mobile phone – but continues to print. In my case, I think that’s a good thing, especially since I did n’t have a single misprint due to detachment from the print bed.
Speed Upgrade
AnkerMake has released a new firmware for the AnkerMake M5 (as of April 17th, 2023) . In the proprietary AnkerMake slicer there is now a “normal” and a “speed mode”. The latter is now 500mm/s at 5000mm/s² instead of a maximum of 250mm/s . However, the speed mode is only available for PLA for the time being . A benchy is therefore possible in 30 instead of 44 minutes . The print quality should only be slightly worse than at 250mm/s.
In this context, AnkerMake emphasizes that the hardware of the device could also create a Benchy in 17 minutes. Loss of quality and power consumption are then significantly higher. The same applies here: The final speed varies enormously depending on the print layer and its properties. Feel free to give us feedback on how the speed mode performs for you if you own the AnkerMake M5.
Printing results: good – mostly.
- Remarks
I assume that the default parameters in the proprietary slicer are already optimized for the M5. I therefore always print at 250mm/s (standard speed) with only one exception. In the course of the prints presented below, I only adjusted the hotend temperatures a little, deactivated the combining in the top player, adjusted the infill depending on the model and, in the case of TPU , lowered the print speed to 100mm/s. The filament was unconditionally kindly provided to us by GIANTARM for free.
Benchy in the house
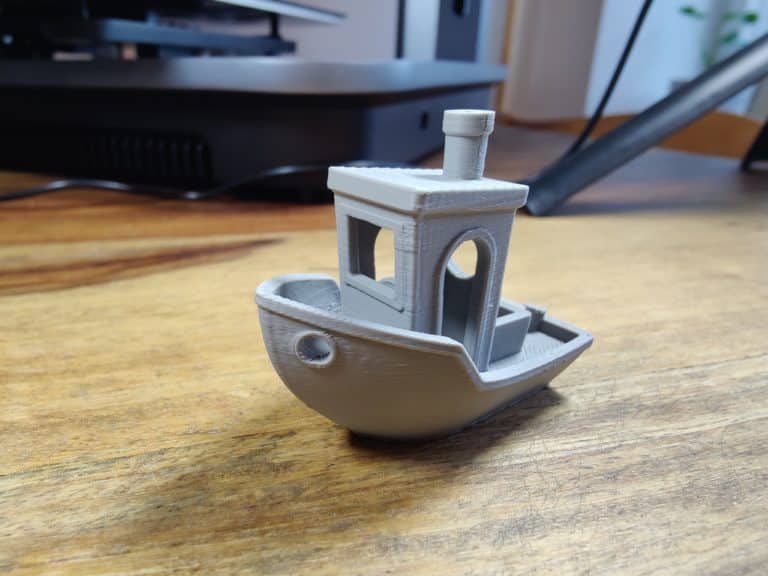
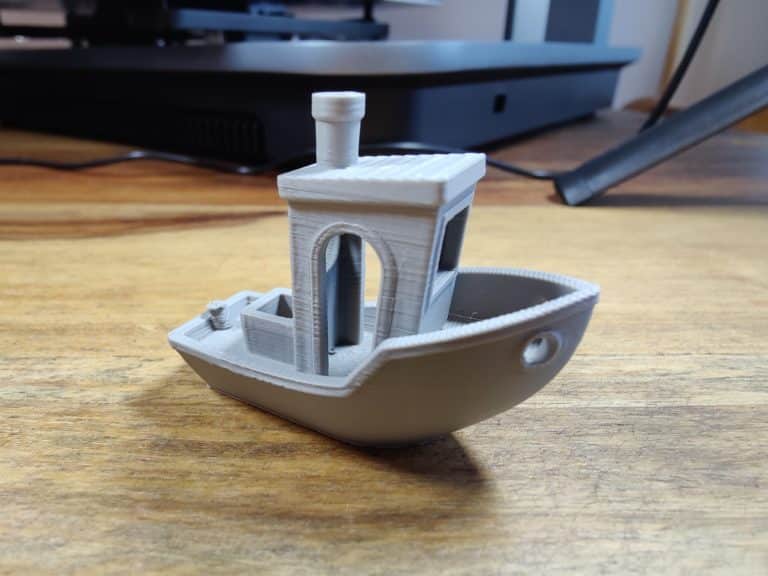
Now we come to the print models, almost all of which I print with the aim of being able to use them for other purposes afterwards. First I print the pre-sliced Benchy in the device memory in super fast ~41 minutes, which is planned as a small gift for the child next door. For this I choose the GIANTARM filament in matt gray. I’m really impressed with how fast the AnkerMake M5 prints. It flies over the print bed, as if someone had secretly pressed the fast-forward button. Apart from the rear pin, the Benchy looks very neat – especially considering that it was created at 250mm/s.
Voronoi style bench
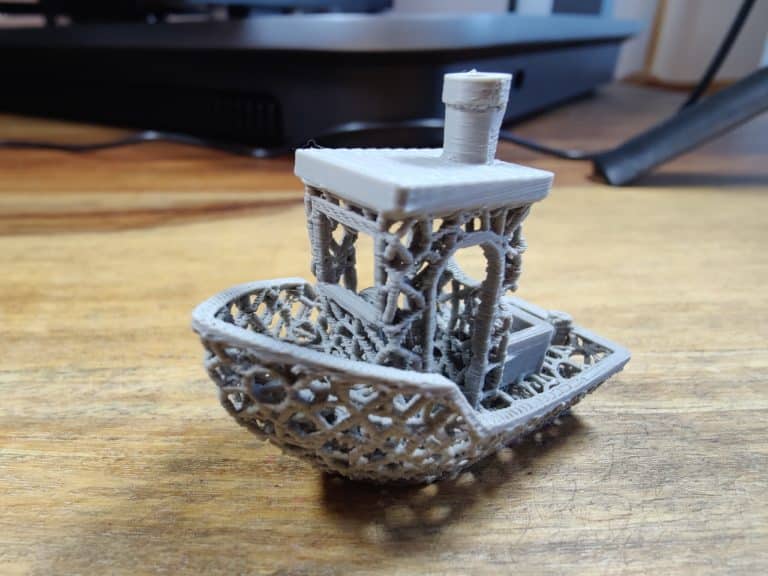
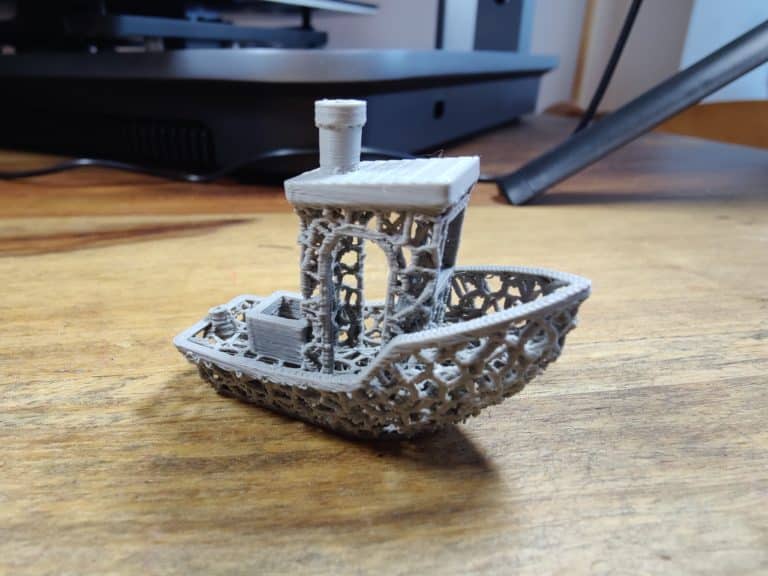
Since I had the feeling that the AnkerMake M5 was almost bored with the pressure, I also slice a Benchy in the AnkerMake slicer , but this time in the Voronoi style. The result also comes in the gray filament and shows many artefacts . But: for this scale and the small filigree ramifications, this is just damn good for an FDM printer at 250mm/s. Of course, an SLA printer like the Anycubic Photon Mono X could show its strengths here.
Money box as own design
Next, I print a design created in Fusion 360. It is the lettering ZAQ, whereby the Q has been converted into a money box for our quiz of the same name. The model fills a large part of the heating bed. I use this to test the printer’s bed adhesion and bridging capabilities. Dark blue silk filament from GIANTARM is used, which I will definitely use more often. The print result after seven hours is mixed: the walls are flawless. The bridging in the form of the two sides of the hollow “Q” is also very successful. However, this does not apply to the top layer, which has clear misprints.
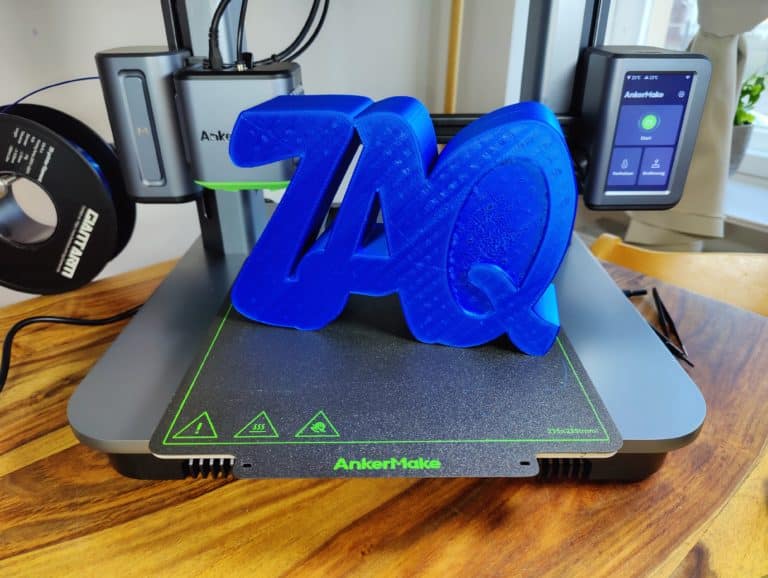
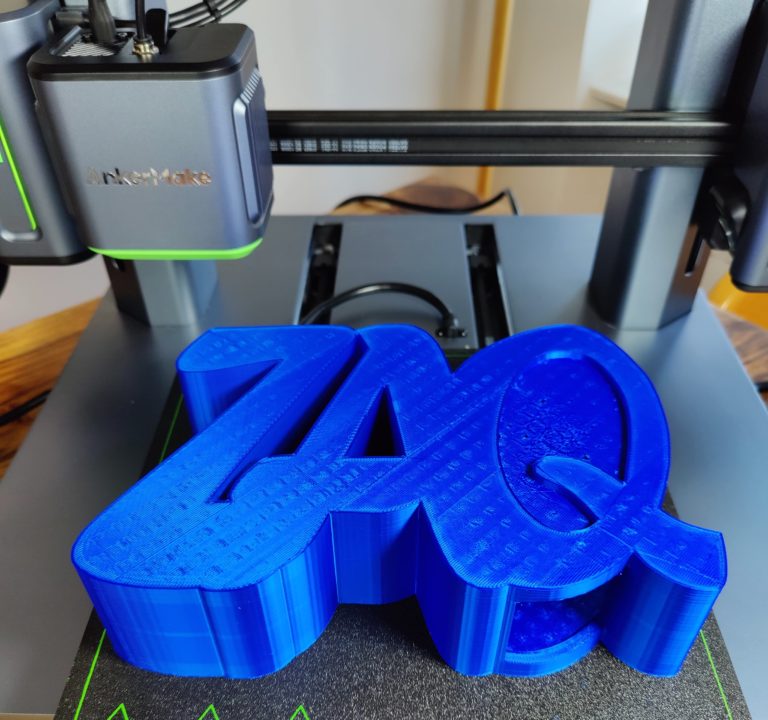
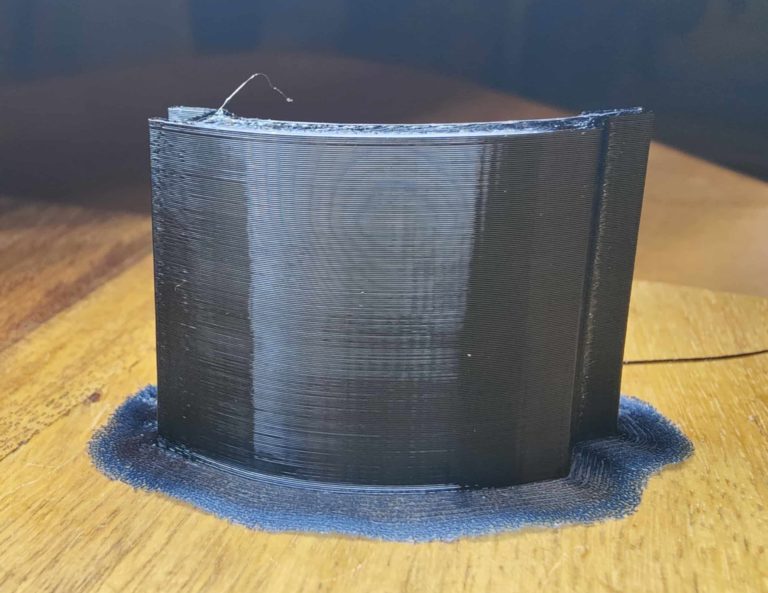
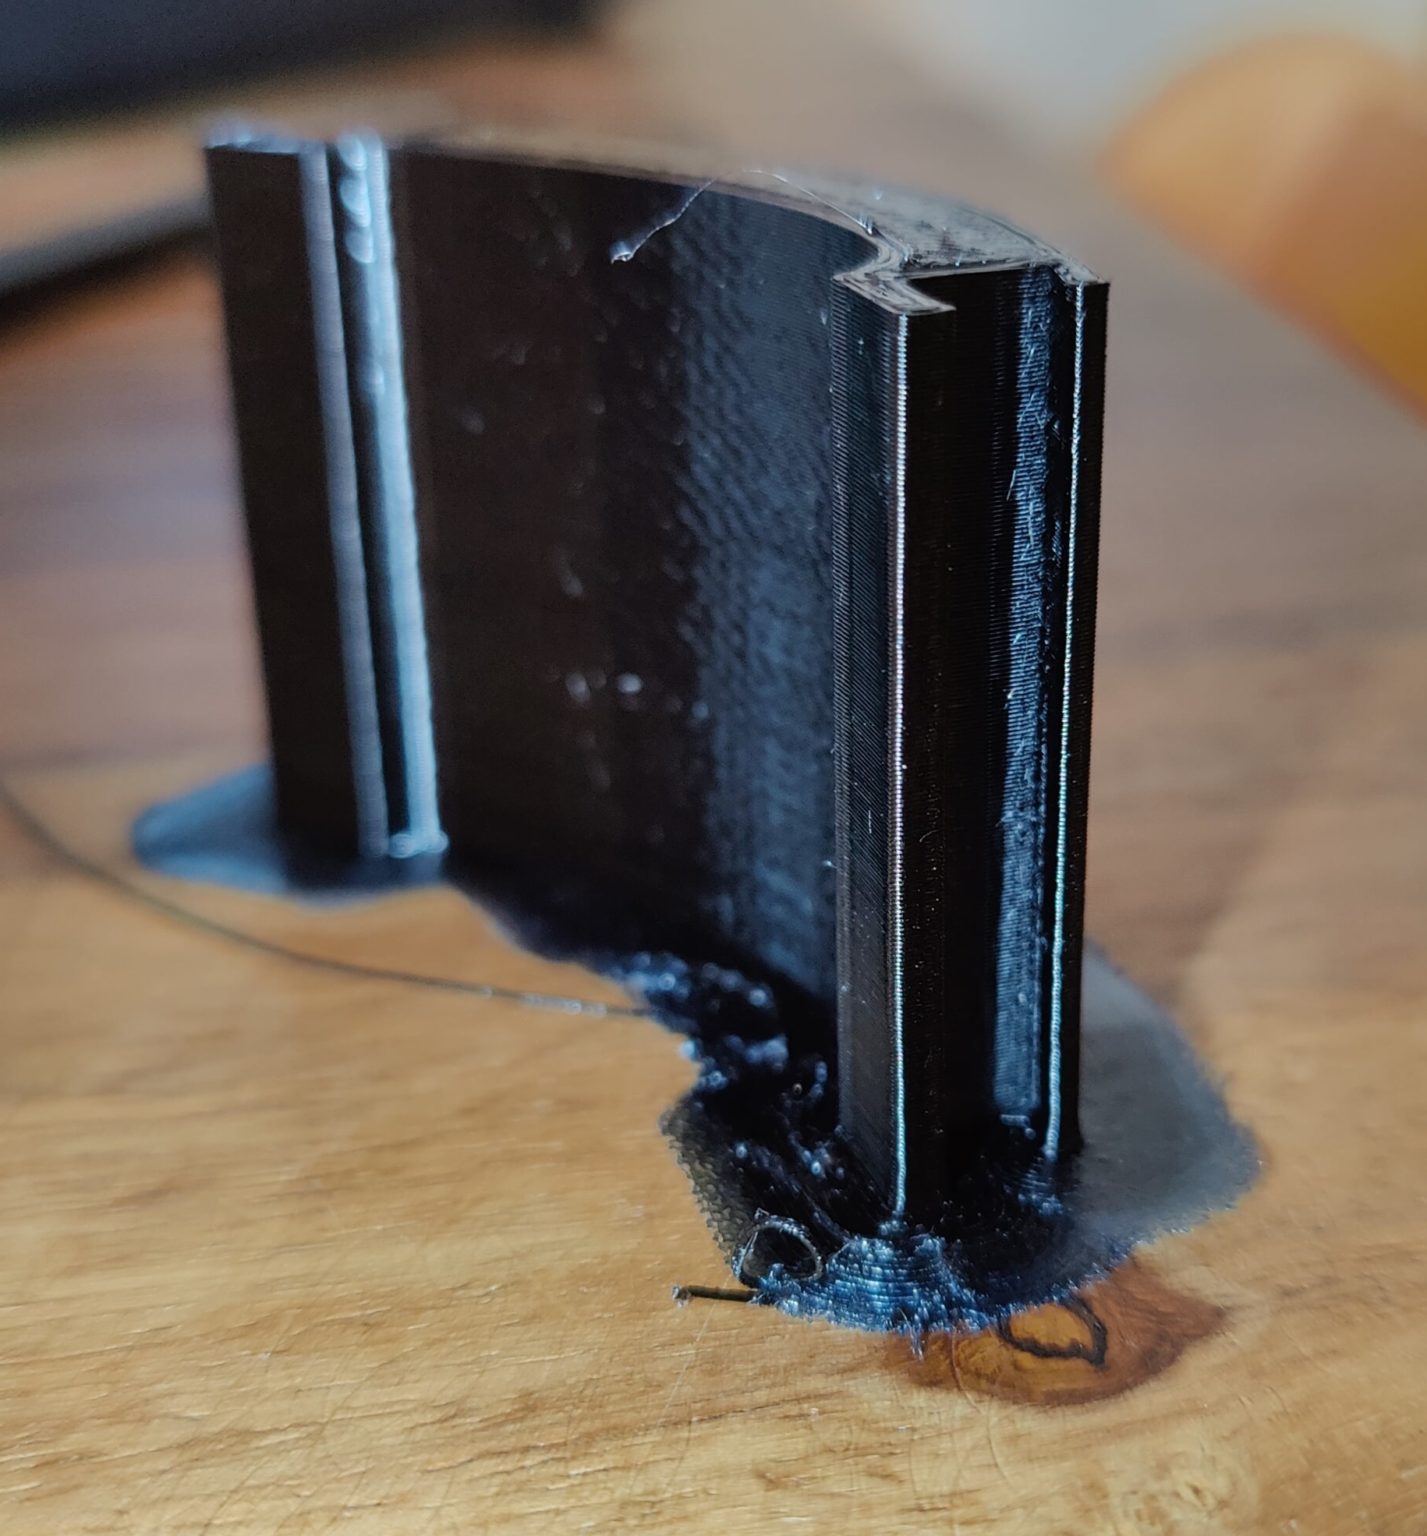
Since a money box usually has a hole at the bottom, I construct a lid with retaining lips , but print it with black TPU and 100mm/s. Because: If with other i3 printers a print speed reduced by more than half for TPU is recommended for good results, then I do not treat the AnkerMake M5 any differently. The result is impressive. The lid comes out of the printer clean with few artefacts. That’s not bad for TPU – especially not at 100mm/s.
Fidget Spinner
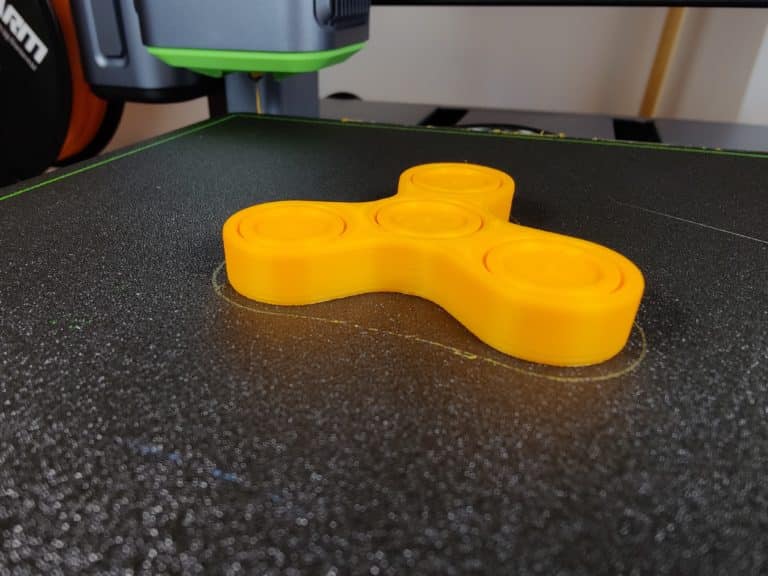
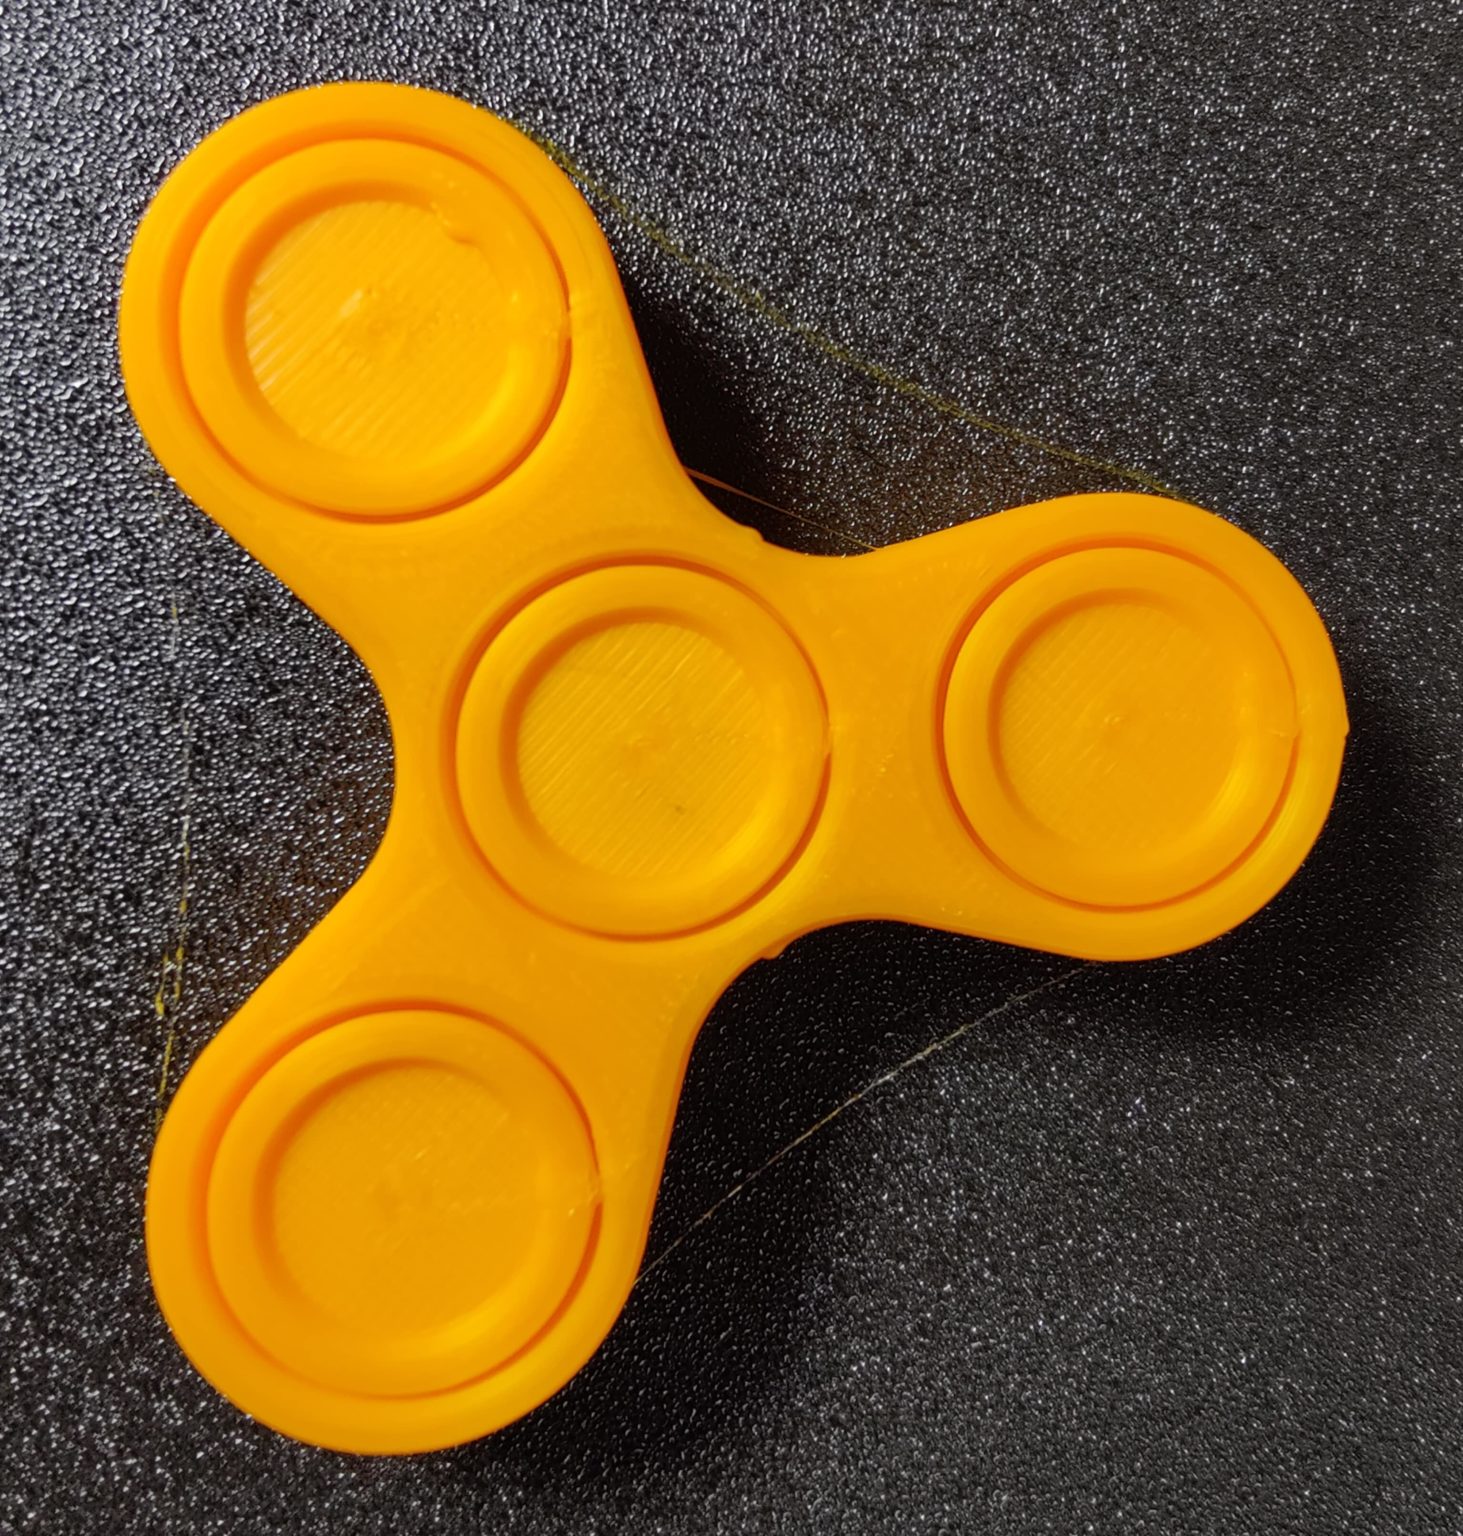
I switch from black TPU to the CG-typical color orange. Using PLA filament I print a fidget spinner (funny enough my daughter’s whole class wants one now). He looks really great. There are minor artefacts, otherwise it looks good. If I hadn’t forgotten to disable combining for the skin, the result would have been even better.
Torture toaster
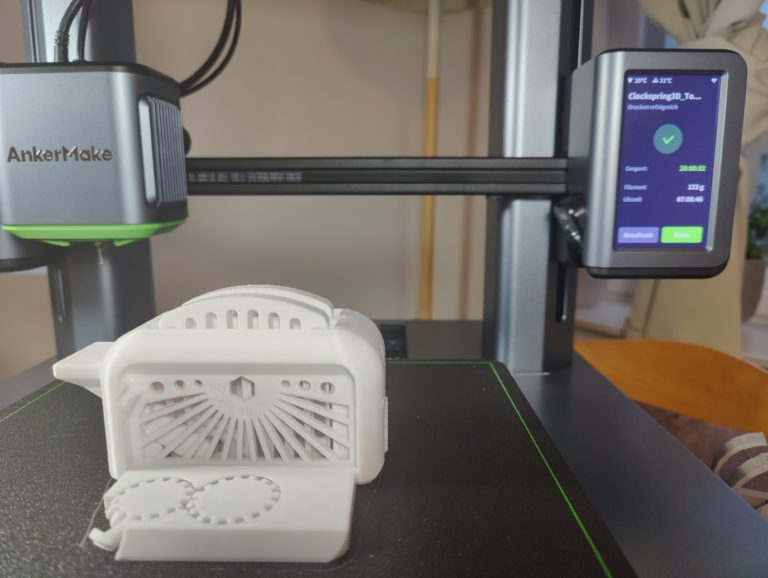
A toaster should not be missing in any play kitchen, right? Exactly. So next up is a model called the Torture Toaster by Clockspring (Thingiverse) . For this case of hardship I use HS-PLA from GIANTARM, which the manufacturer made available to us in white and black . HS stands for High Speed: The filament should therefore be particularly suitable for “high-speed printers”, have a higher degree of hardness and allow smoother surfaces
The result after 7.5 hours and 9 AI false reports is good on the one hand: on the front-facing side, the little toaster looks like it has been licked – and that at 250mm/s! Everything moves beautifully. On the back side, however, there are clear blobs and other small artefacts on the upper side. In addition, the slide bars in the toaster cannot be moved easily here.

Mini All-in-On test times 2
I get to the bottom of the HS-PLA in white even further by doing the mini all-in-one test twice : once with normal matt gray PLA , once with white HS-PLA . In both cases, the test prints for 250mm/s come out of the printer very cleanly. In terms of print quality, there are minimal artefacts. I’m particularly impressed by the grandiose bridging properties – that’s where the monster cooling plays its trump cards.
Compared to the matt gray PLA, the white HS-PLA shows : It masters overhangs a little better: With matt gray PLA, a significant deterioration in print quality can be seen at 60 degrees overhangs, with white HS-PLA only at 70 degrees. In addition, the hanging artefacts are slightly less long at 80 degrees.
iMakr Jenga Bars
In the end I decide against ASA. On the one hand, because printing without a housing is actually pointless (unless you like warping), on the other hand, because it smells stinky and I don’t want to constantly air our living room in winter. Instead, PETG is back in the CG color orange. I don’t use this to print a calibration cube, but a calibration bar called IMakr-Jenga.
There will be several of these in the future so that we can call a Jenga tower game our own. The bar comes out of the printer okay , stringing can be seen. I feel the printing temperature is too high. AnkerMake specified a full 260 degrees in the predefined PETG slicer profile – that’s too high. Especially when you consider that the hotend has a PTFE inlay, which is known to slowly degenerate from 260 degrees and produce toxic gases.
Conclusion: Great debut with room for improvement
Anker’s first 3D printer isn’t perfect. But like the even better Bambu Lab X1, it raises the bar for other 3D printers in terms of speed, comfort and usability. So AnkerMake is on the right track. The M5 is a workhorse. Once you have found the right settings for you, it probably means: set and forget. However, there is still a need for optimization in the software, in particular the AI, the filament feed and the volume.
When that happens, the AnkerMake M5 has definitely earned a spot on the podium.However, its price of 849 euros is no small matter . But since Bambu Lab offers the P1P – a slimmed down version of the Bambu Lab X1 – with 500mm/s for a similar price, AnkerMake will have to improve the price. But it could become even more attractive for prospective buyers. how do you see it? Are you toying with the printer? Will AnkerMake attract more buyers with it? Tell us what you think.
Pros
- 250mm/s, now 500mm/s (for PLA)
- easy assembly and good instructions
- very good prints out of the box
- Auto leveling fully automatic
- direct drive
- AI Monitoring
- integrated 1080p cam
- App connection & push notification
- Slicer (AnkerMake, Cura, Simplify 3D)
- high quality, stable, stylish
Cons
- high price
- very loud
- Software unfinished (especially AI, slicer)
- Filament retraction could be improved
- no SD card slot
- proprietary components (hotend, nozzles, motherboard, etc.)
- difficult repair due to fairings
